

I introduced client-side encryption (also known as Always Encrypted) in my previous post. In this post, I’ll walk you through the process of configuring this feature, so that your applications can encrypt sensitive information client-side, before sending it to the database in Cosmos DB. Likewise, your applications will be able to decrypt that information client-side, after retrieving it from Cosmos DB.
Let’s examine a concrete use case for client-side encryption. Imagine a Human Resources application and a database of employee documents that look like this:
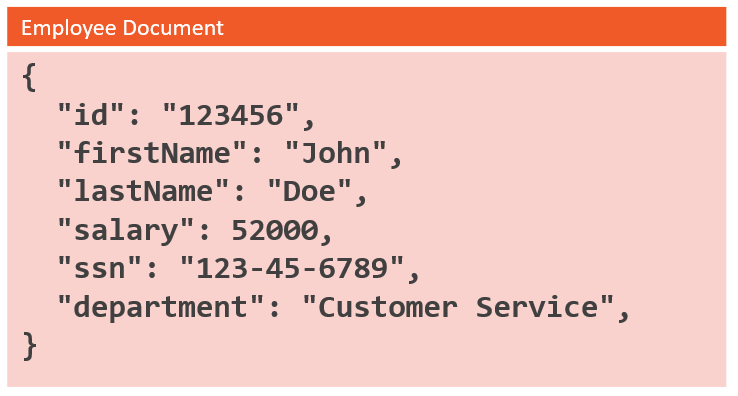
There are two particularly sensitive properties in here that we want to encrypt so they can only be accessed by specific applications; notably the salary and social security number. In particular, we have an HR Service that requires access to both properties, and an HR Staff application that should be able to access the salary but not the social security number.
To achieve this, we’ll create two new customer-managed keys in two new Azure Key Vaults. Now it’s certainly possible to create multiple keys in a single vault, but here we need two separate vaults because we have two separate applications with different access policies, and the application access policy get defined at the key vault level. So we’ll have one CMK in one key vault for encrypting the salary property, and another CMK in another key vault for the Social Security Number, as illustrated below:
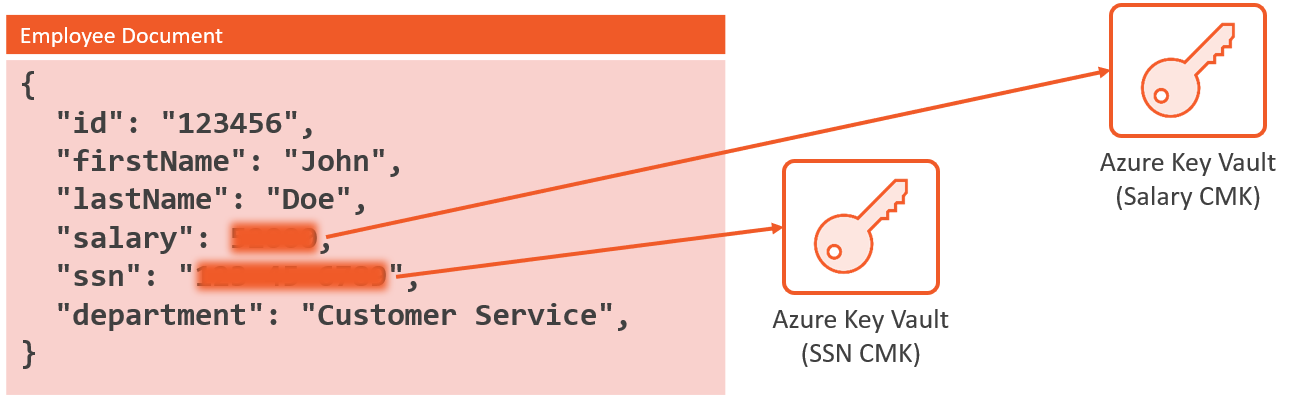
Client applications need to be expressly authorized for each key vault in order to be able to access the key needed to encrypt and decrypt these properties. Here are three applications, an ordinary user application that can’t access either property, an HR Staff application that can access the salary property but not the SSN property, and an HR Service application that can access both the salary and SSN properties:
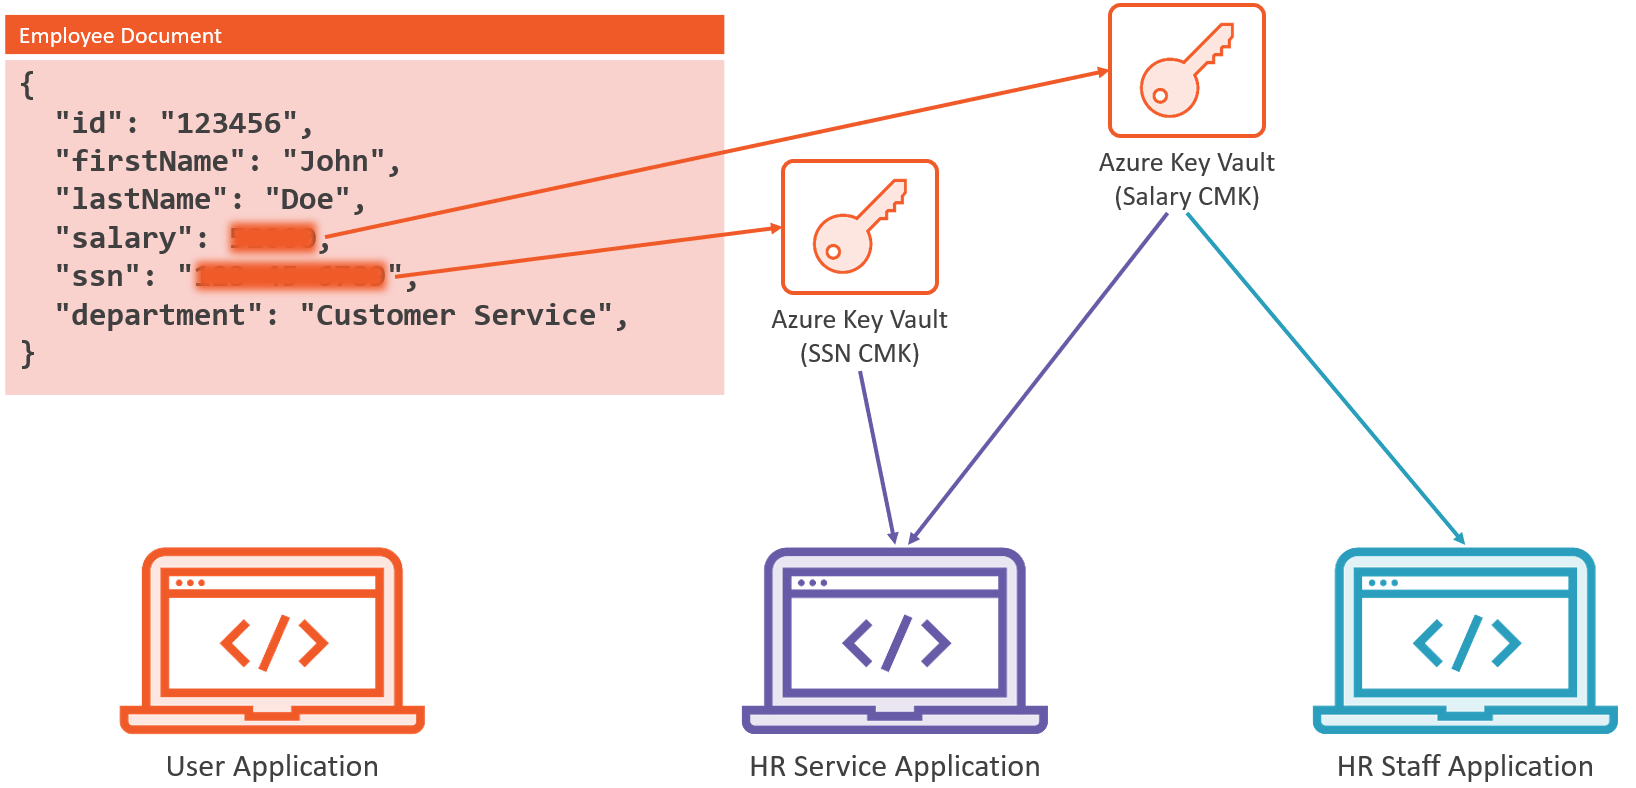
So an ordinary user application that has no access to either vault gets no access to these properties. This application can read documents, but won’t be able to view the salary or SSN; nor will it be able to create new documents with either a salary or SSN.
Meanwhile, we have our HR Staff Application, which we have added to the access policy of the key vault holding the CMK for the salary property. So this application can access the salary but not the SSN.
And then we’ve got the HR Service, which we’ve added to the access policies of both key vaults, such that this application has access to both the salary and the SSN.
Now let’s configure client-side encryption in the Azure portal for this HR scenario.
First thing we’ll need to do is head over to Azure Active Directory:
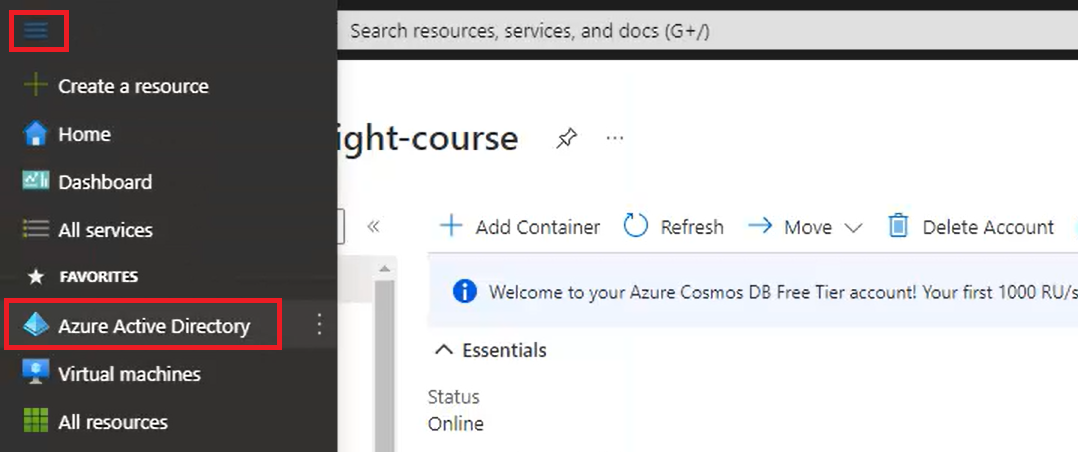
First we’ll need the Azure AD directory ID (also known as the “tenant ID”), which you can copy to the clipboard:
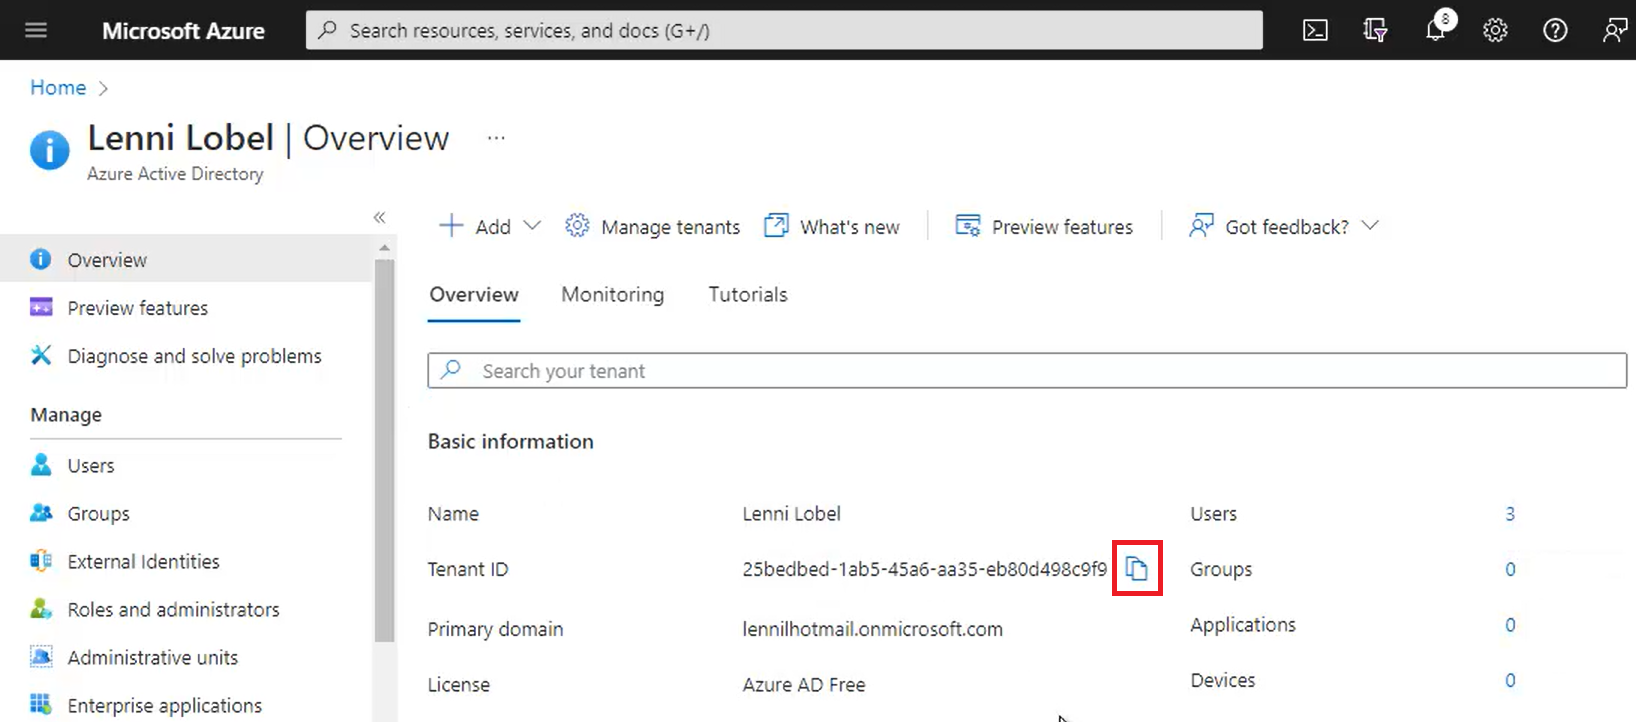
Then paste the directory ID into Notepad so we can use it later. Keep the Notepad window open for pasting additional IDs that we’ll be gathering throughout this process.
Now head over to App Registrations, and then click to create a New registration:
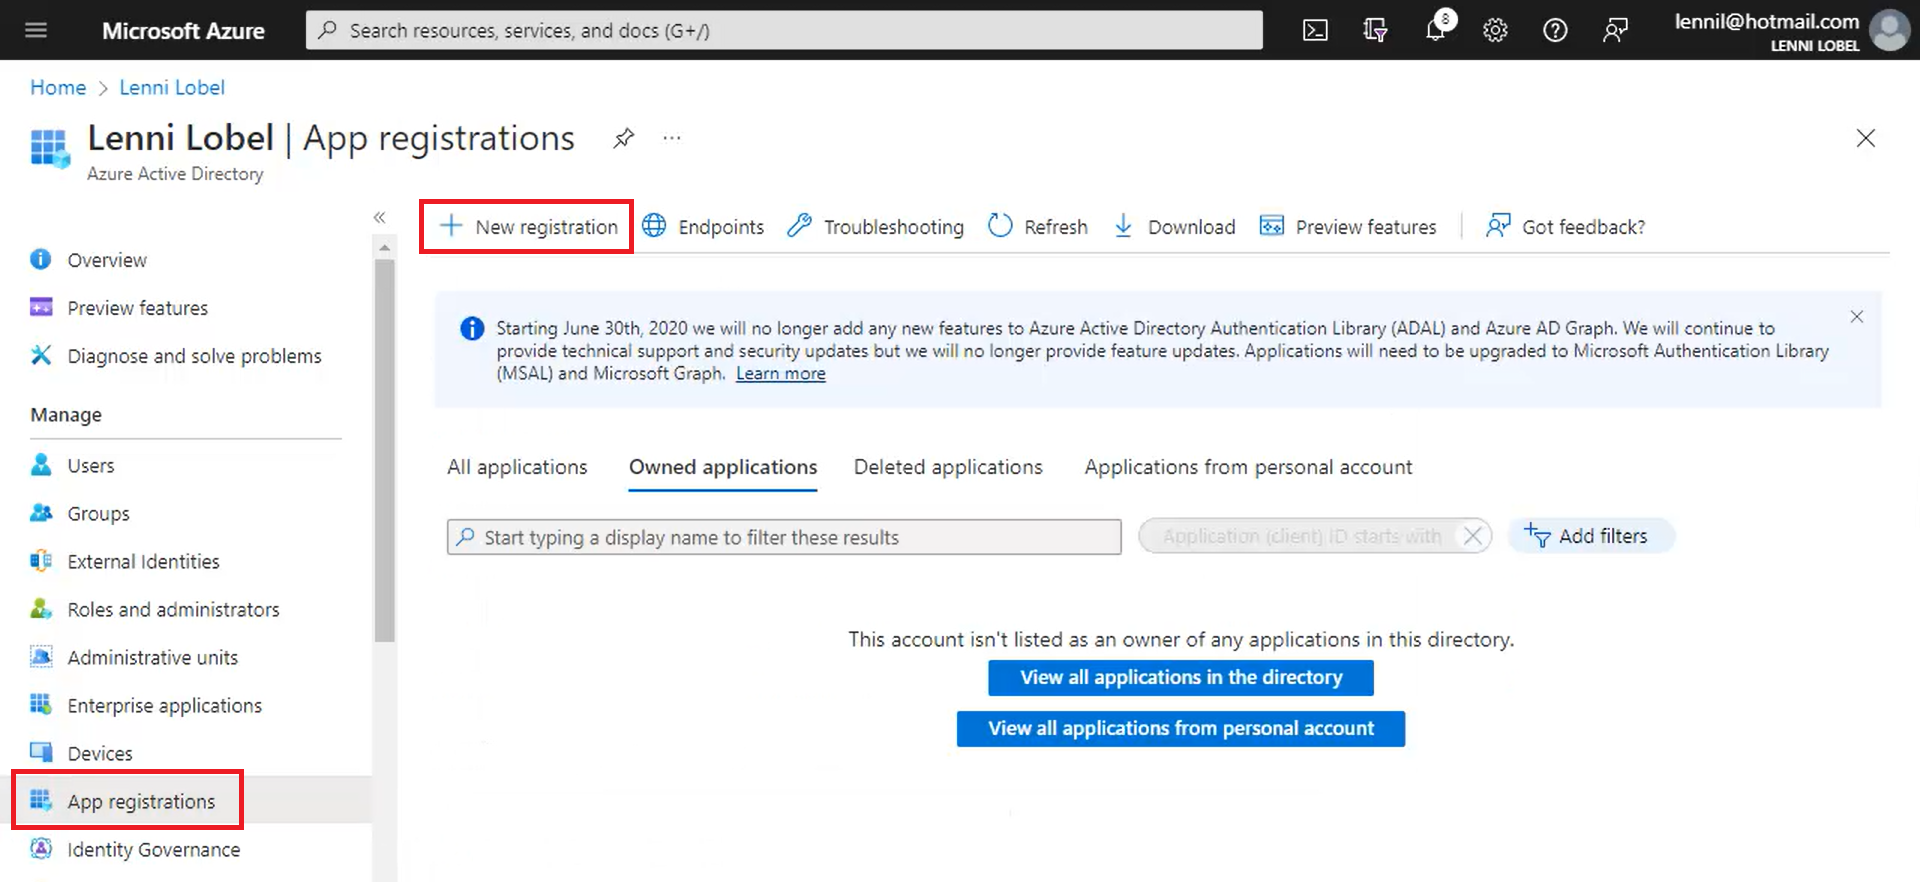
We’ll be creating two app registrations which will be, essentially two identities representing the HR Service and HR Staff applications.
Let’s name the first registration pluralsight-aedemo-hrservice, and click Register.
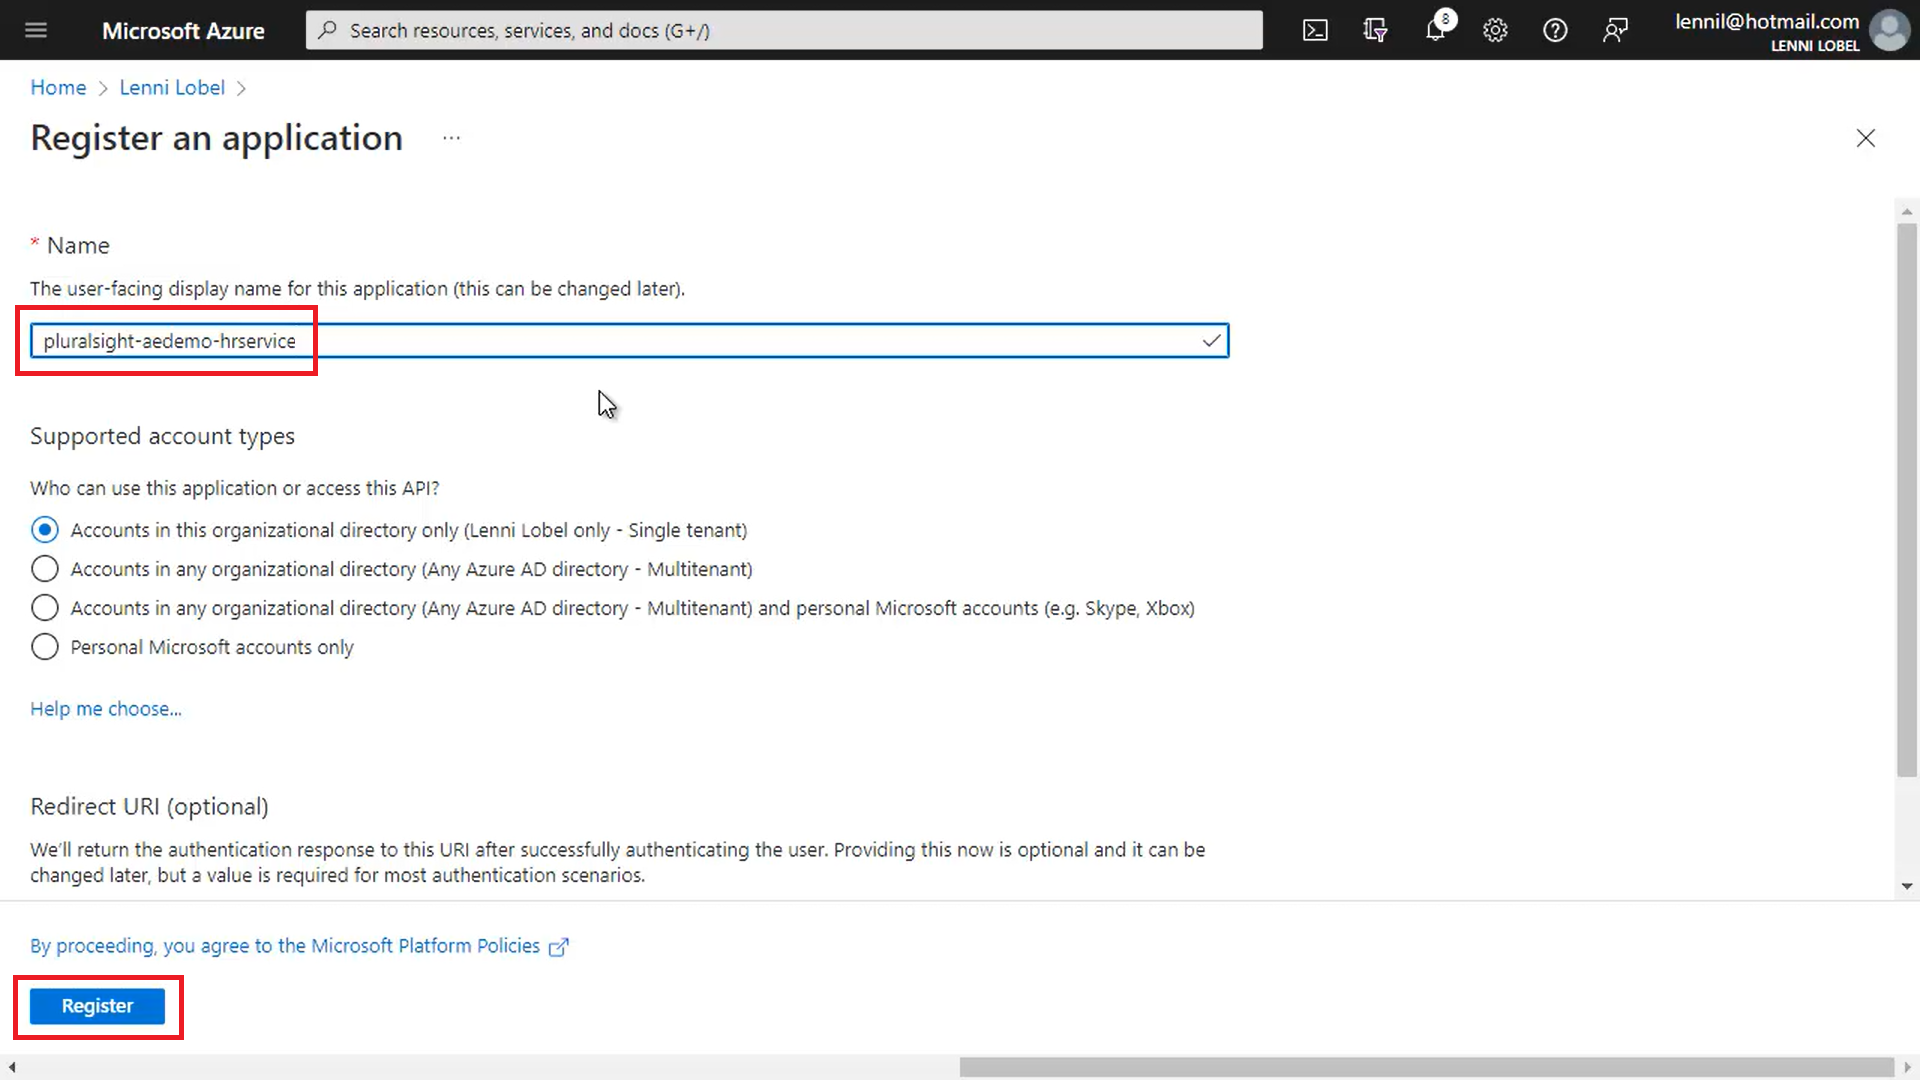
We’ll need the app registration’s client ID (also known as the “application ID”), plus its client secret that we’ll create next. So copy the client ID, and paste it into Notepad:
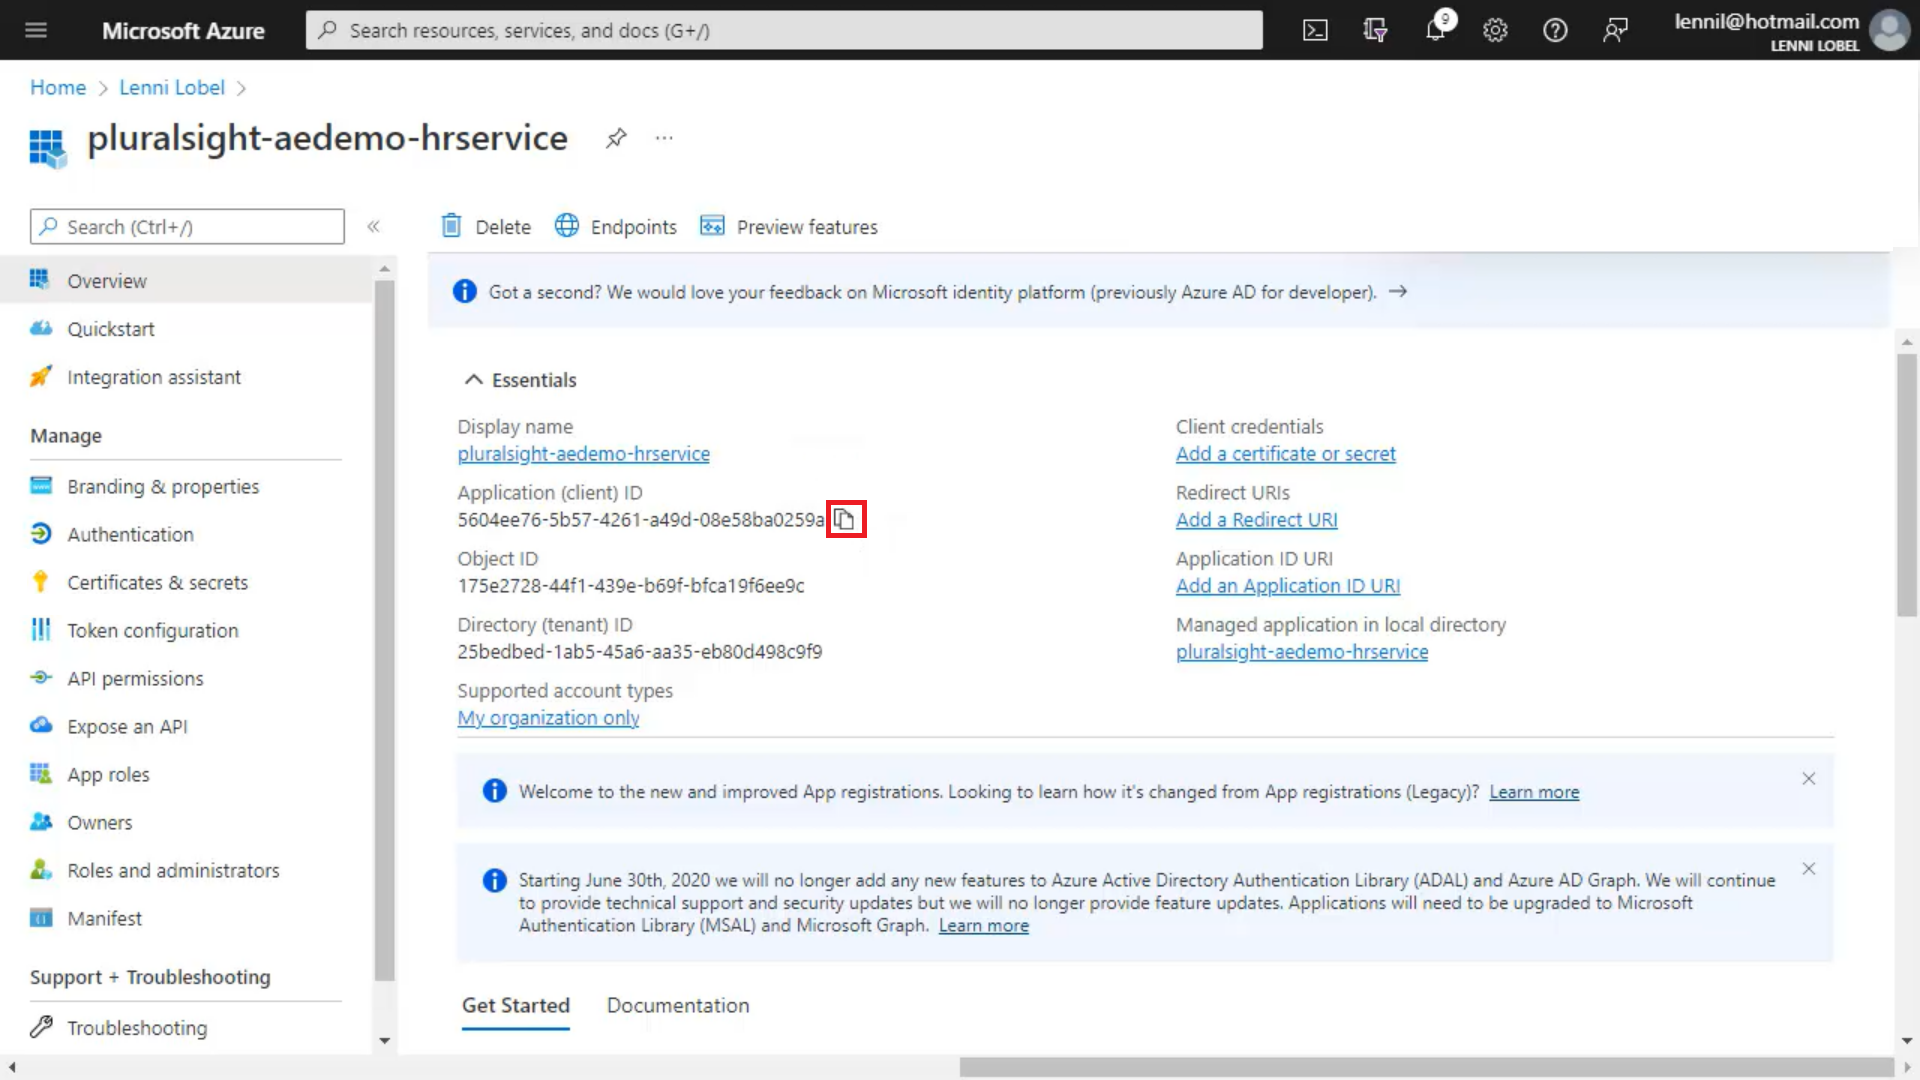
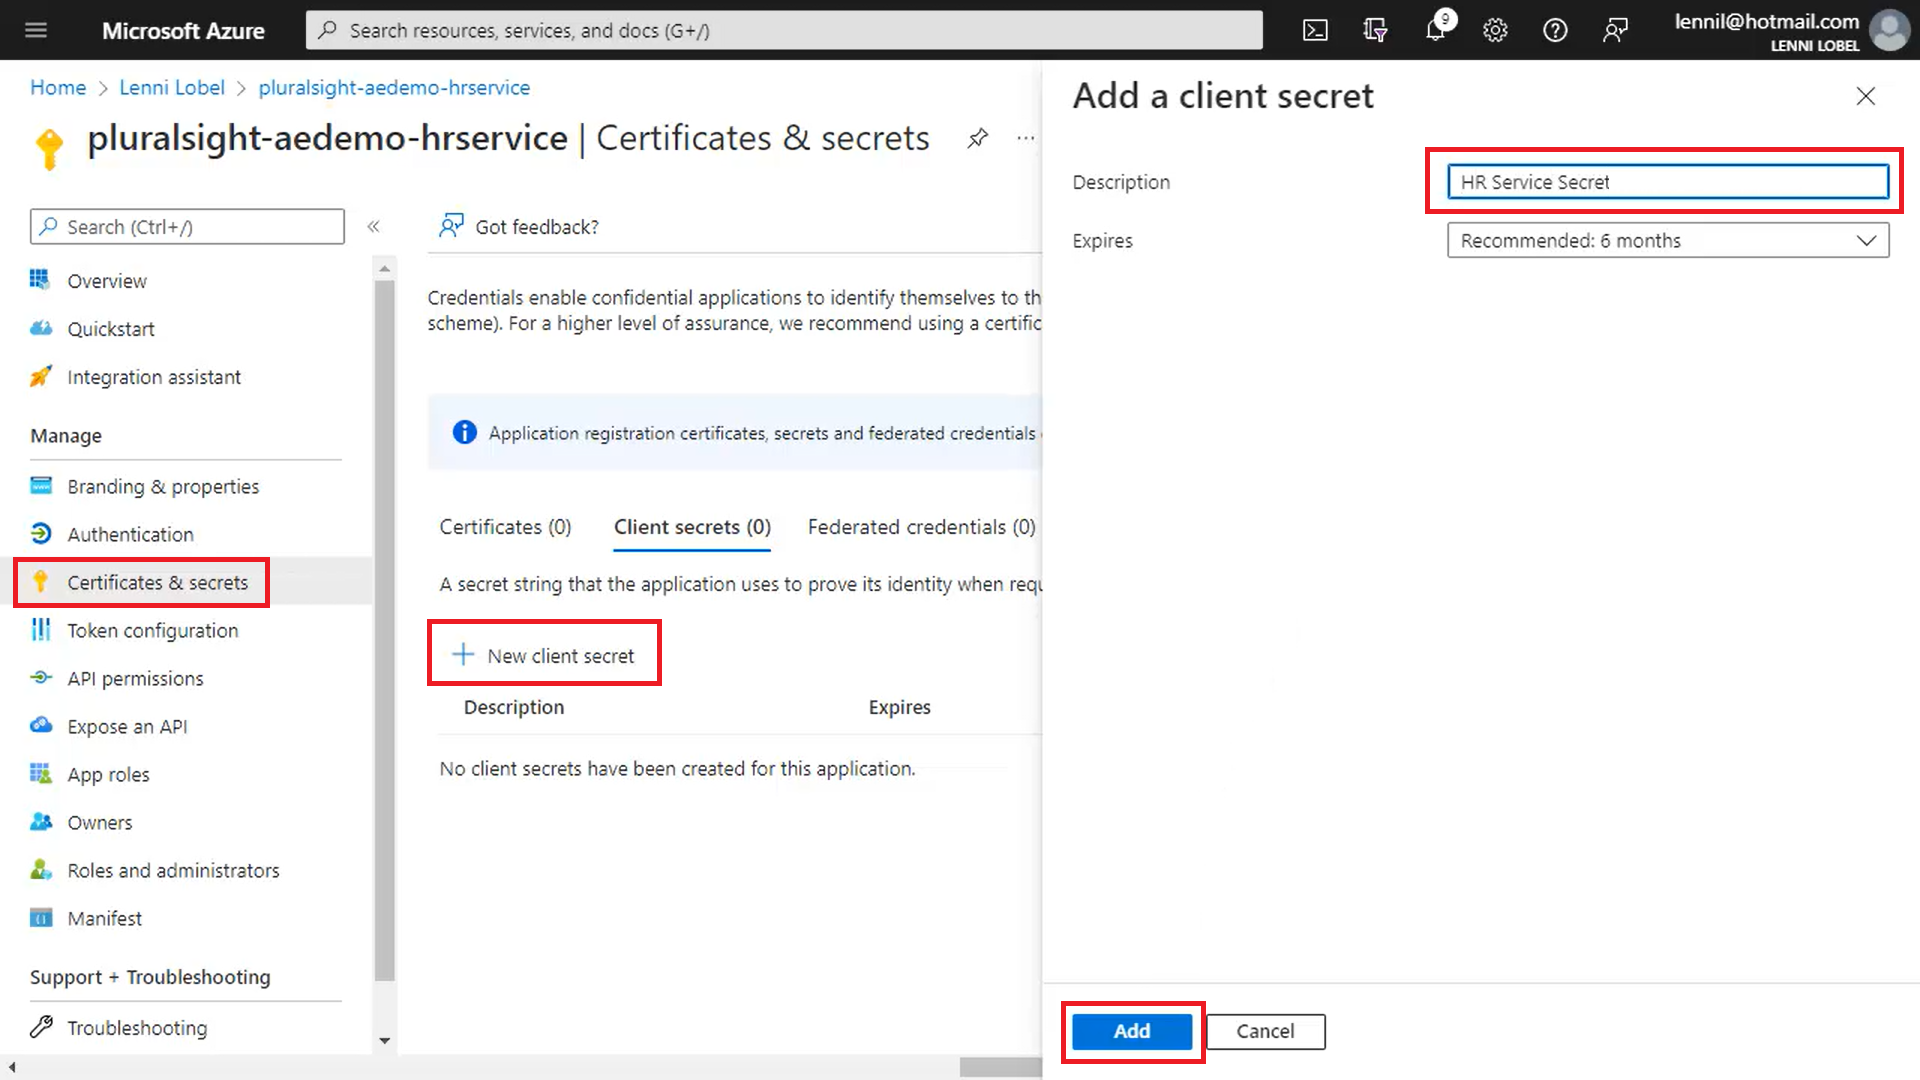
Next, click on Certificates & secrets. Then click New client secret, name it HR Service Secret, and click Add:
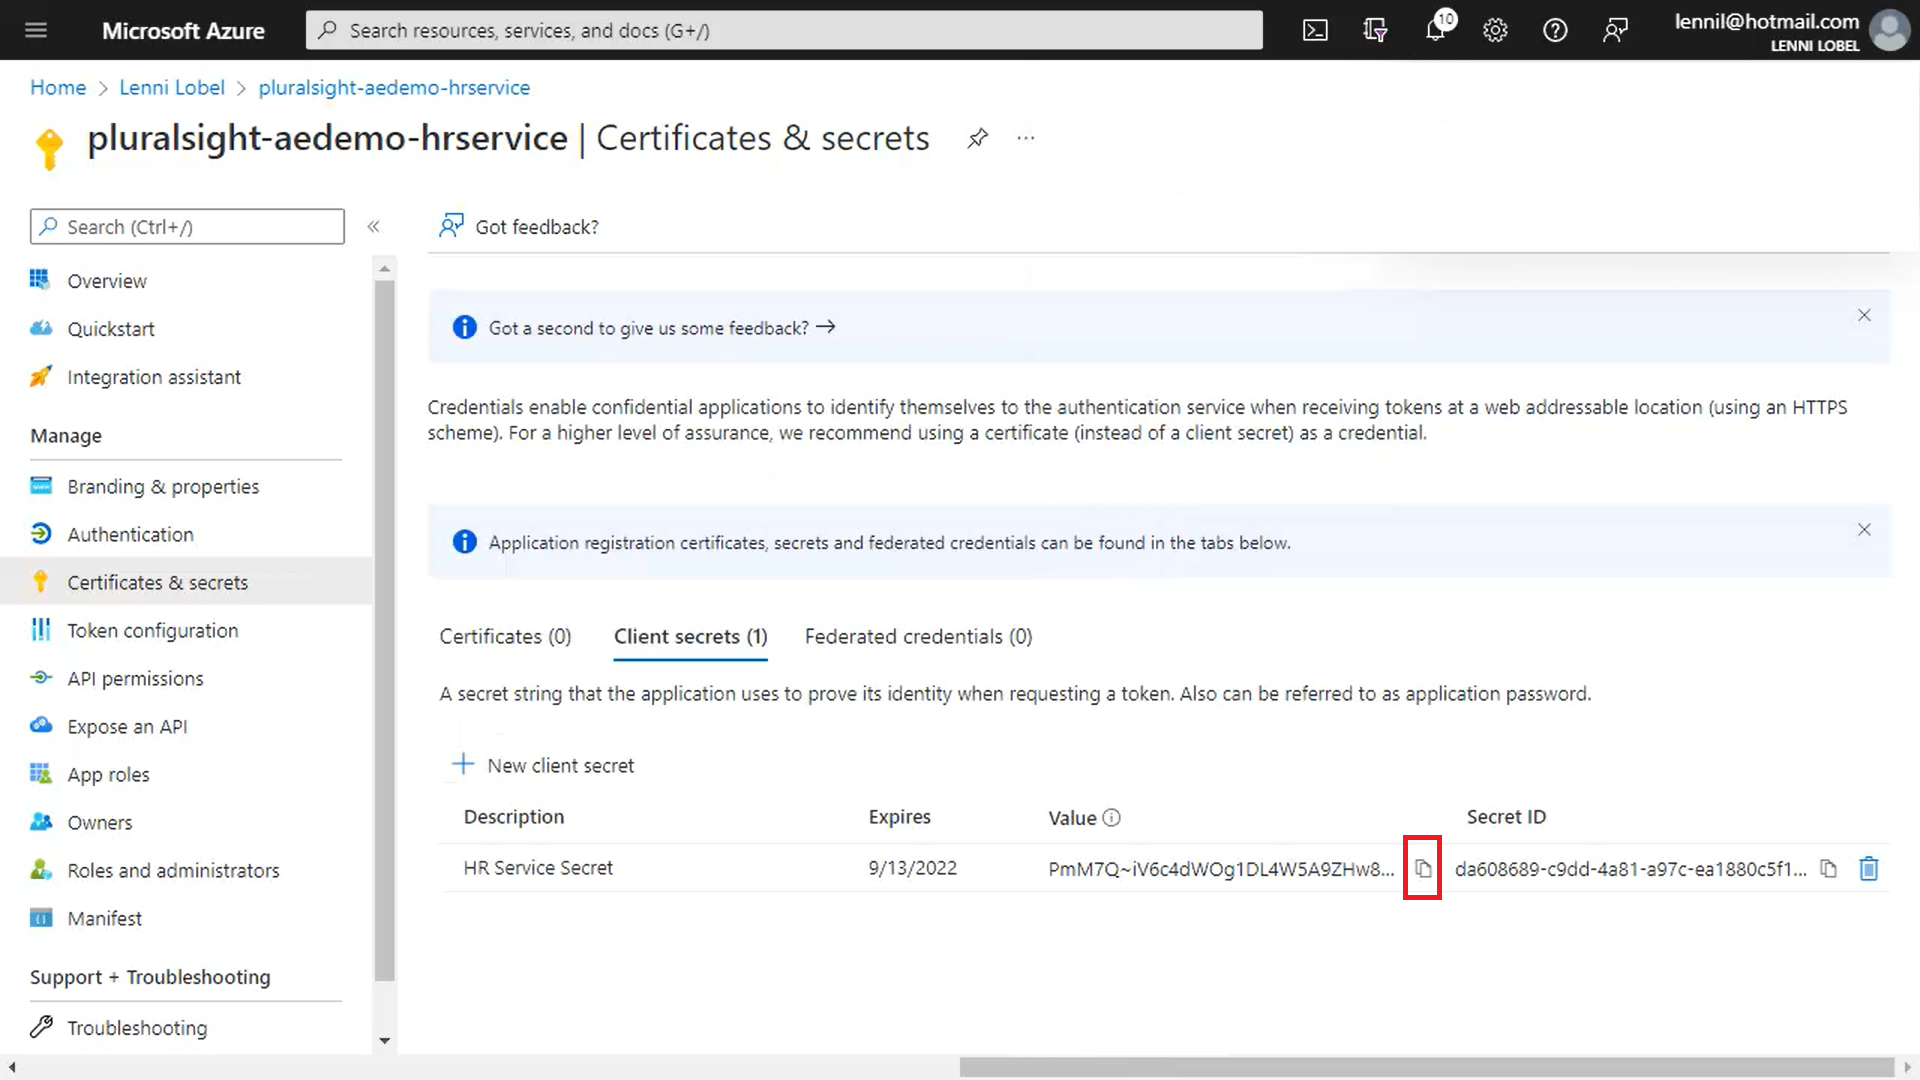
Now copy the client secret and paste it into Notepad (be sure to copy the secret value, not the Secret ID). Also, note that this is the only point in time that the client secret is exposed and available for copying to the clipboard; the Azure portal will always conceal the secret from this point on:
Repeat the same process to configure the HR Staff application:
- Click New Registration, and name it pluralsight-aedemo-hrstaff.
- Copy and paste this app registration’s client ID
- Click to open Certificates and Secrets, and create a new client secret named HR Staff Secret
- Copy the secret value and paste it over to Notepad
Everything is now setup in Active Directory, and it’s time to move on the Azure Key Value.
We need to create the two key vaults for our customer-managed keys that are going to encrypt the salary and social-security number properties.
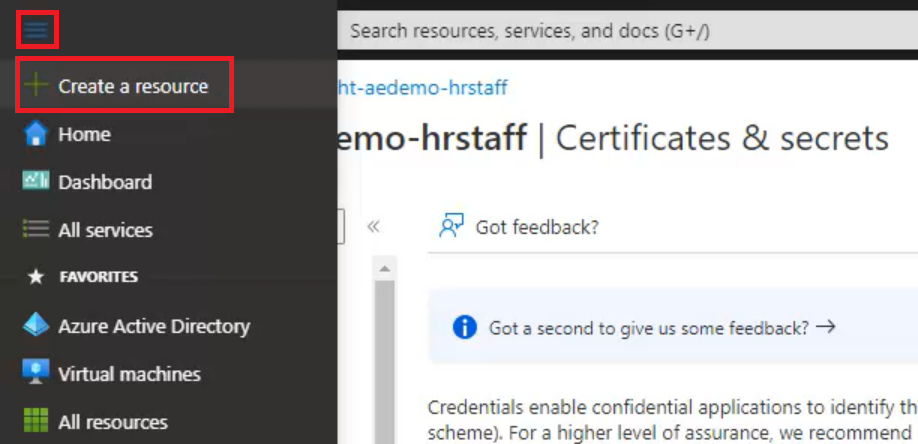
Click to create a new resource:
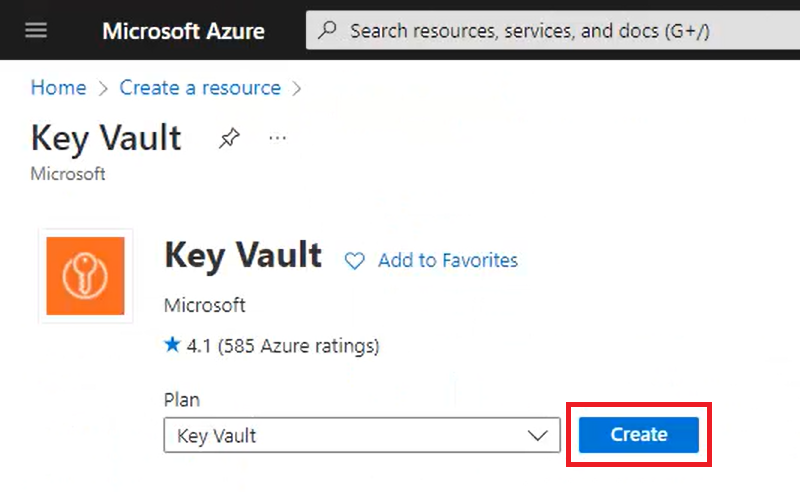
Now search for key vault, and click Create.
Choose a resource group (it can be the same one as the Cosmos DB account), and name the new key vault hr-salary-kv. Then click Next to set the access policy.
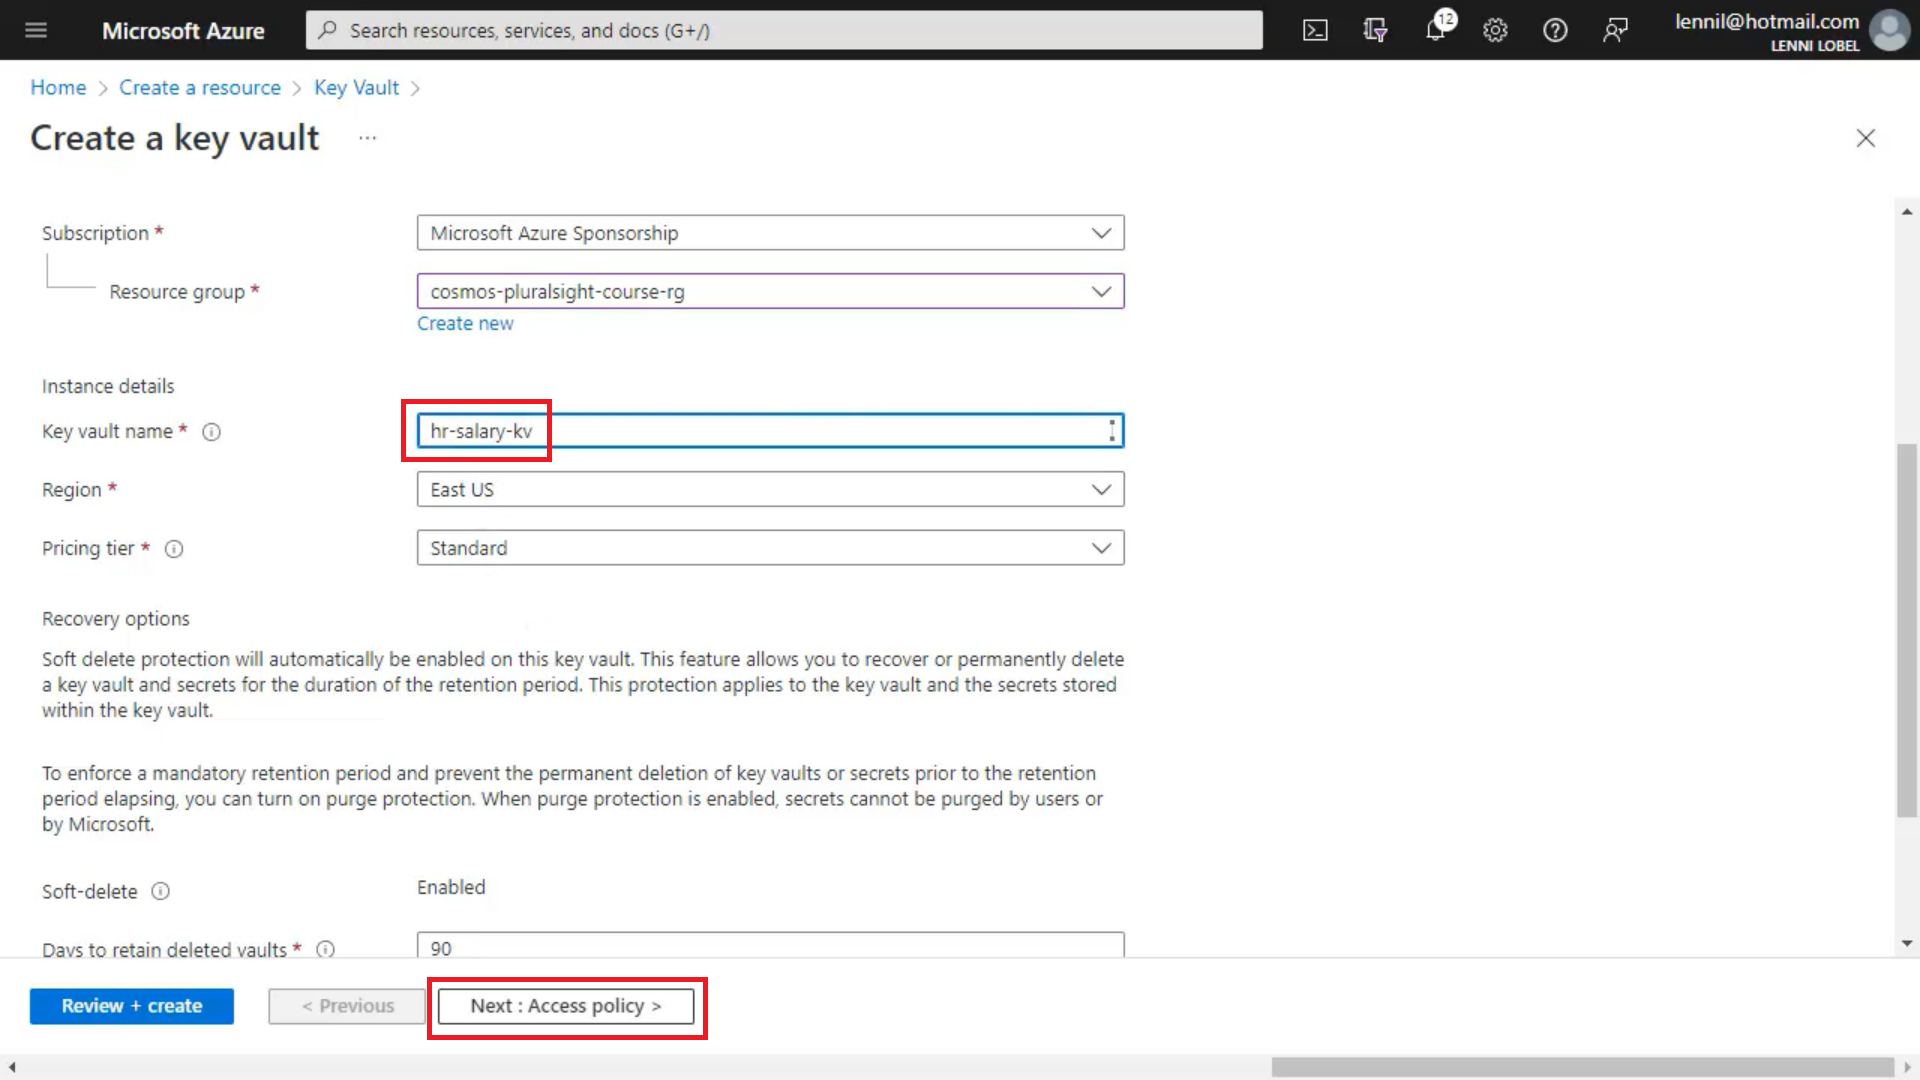
This is where we authorize which applications can access this key vault, and since we want both the HR Service and HR Staff applications to be able to access the salary property, we’ll add an access policy to this key vault for both of those app registrations we just created.
So click Add Access Policy to add the first access policy.
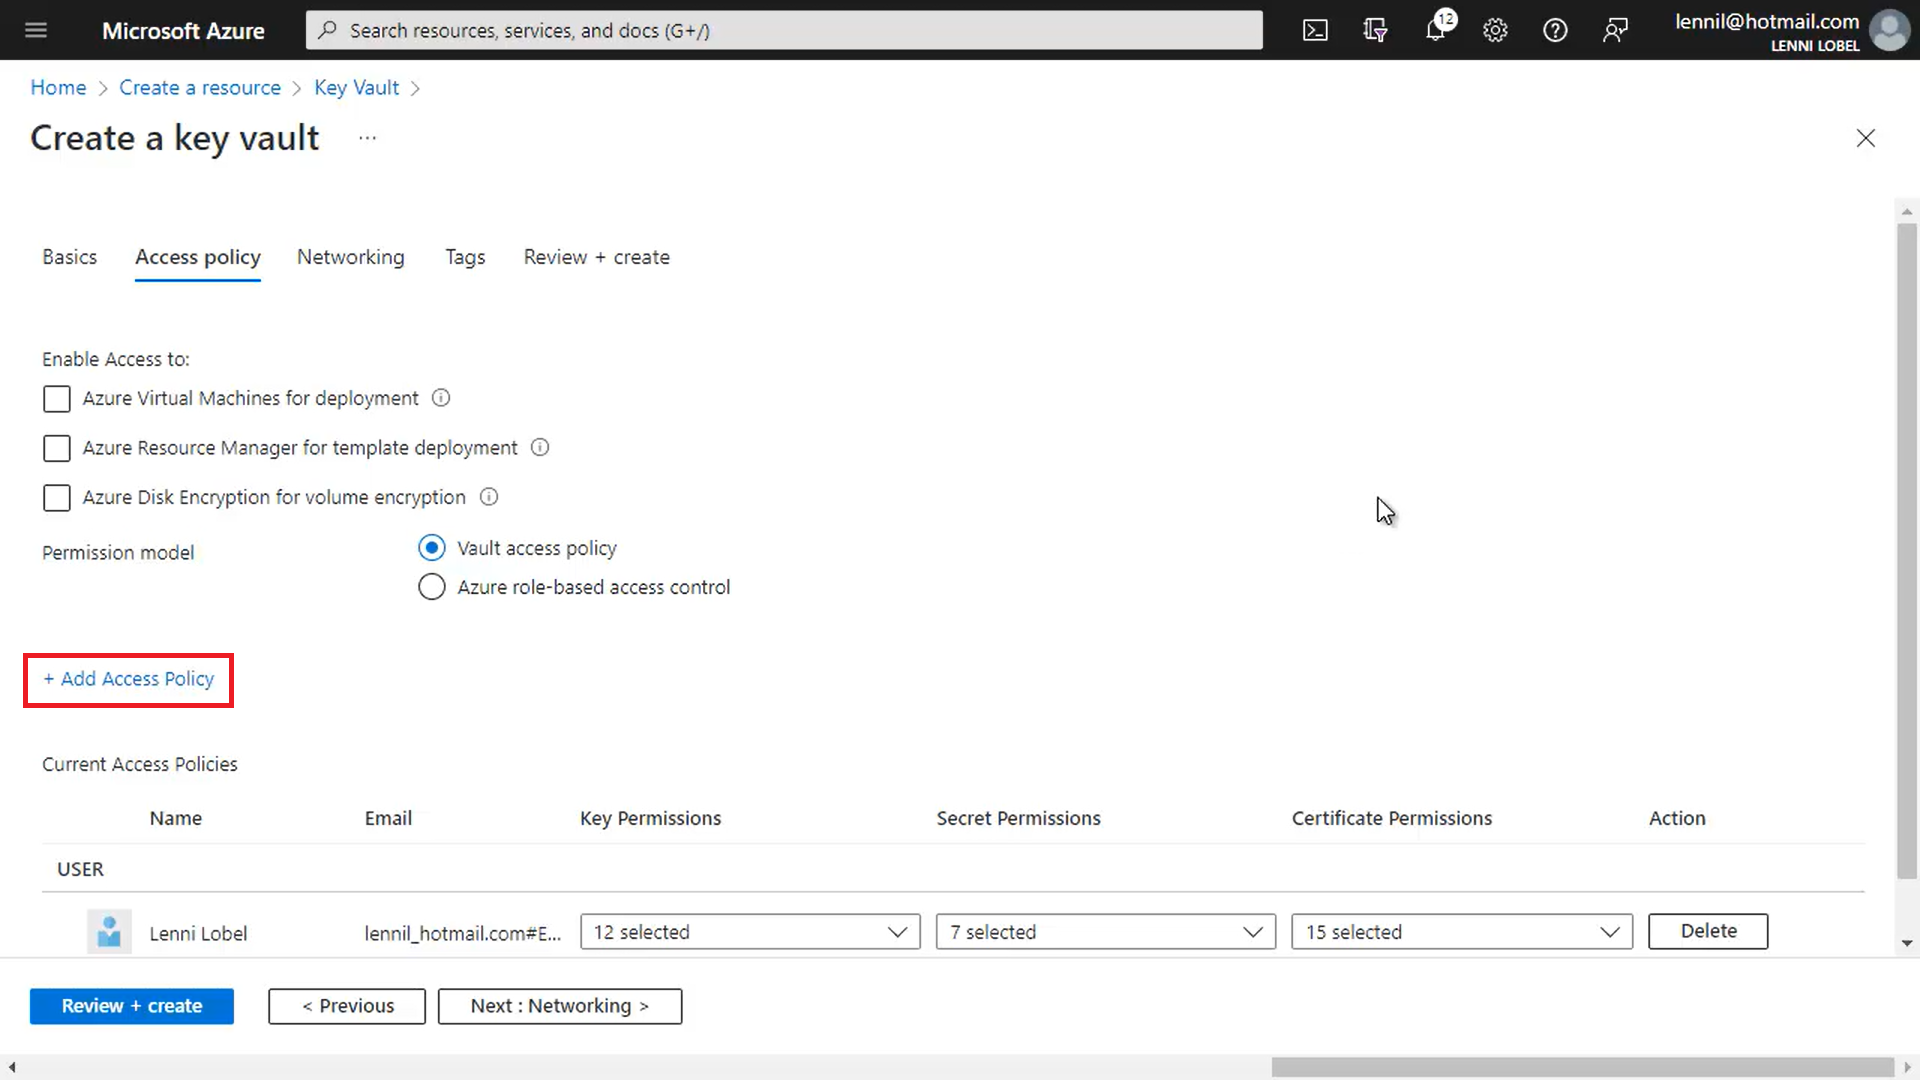
Each policy can be granted a variety of permission, and for our scenario, we need three permissions in particular. So click the Key permissions dropdown and check the Get, Unwrap Key, and Sign permissions:
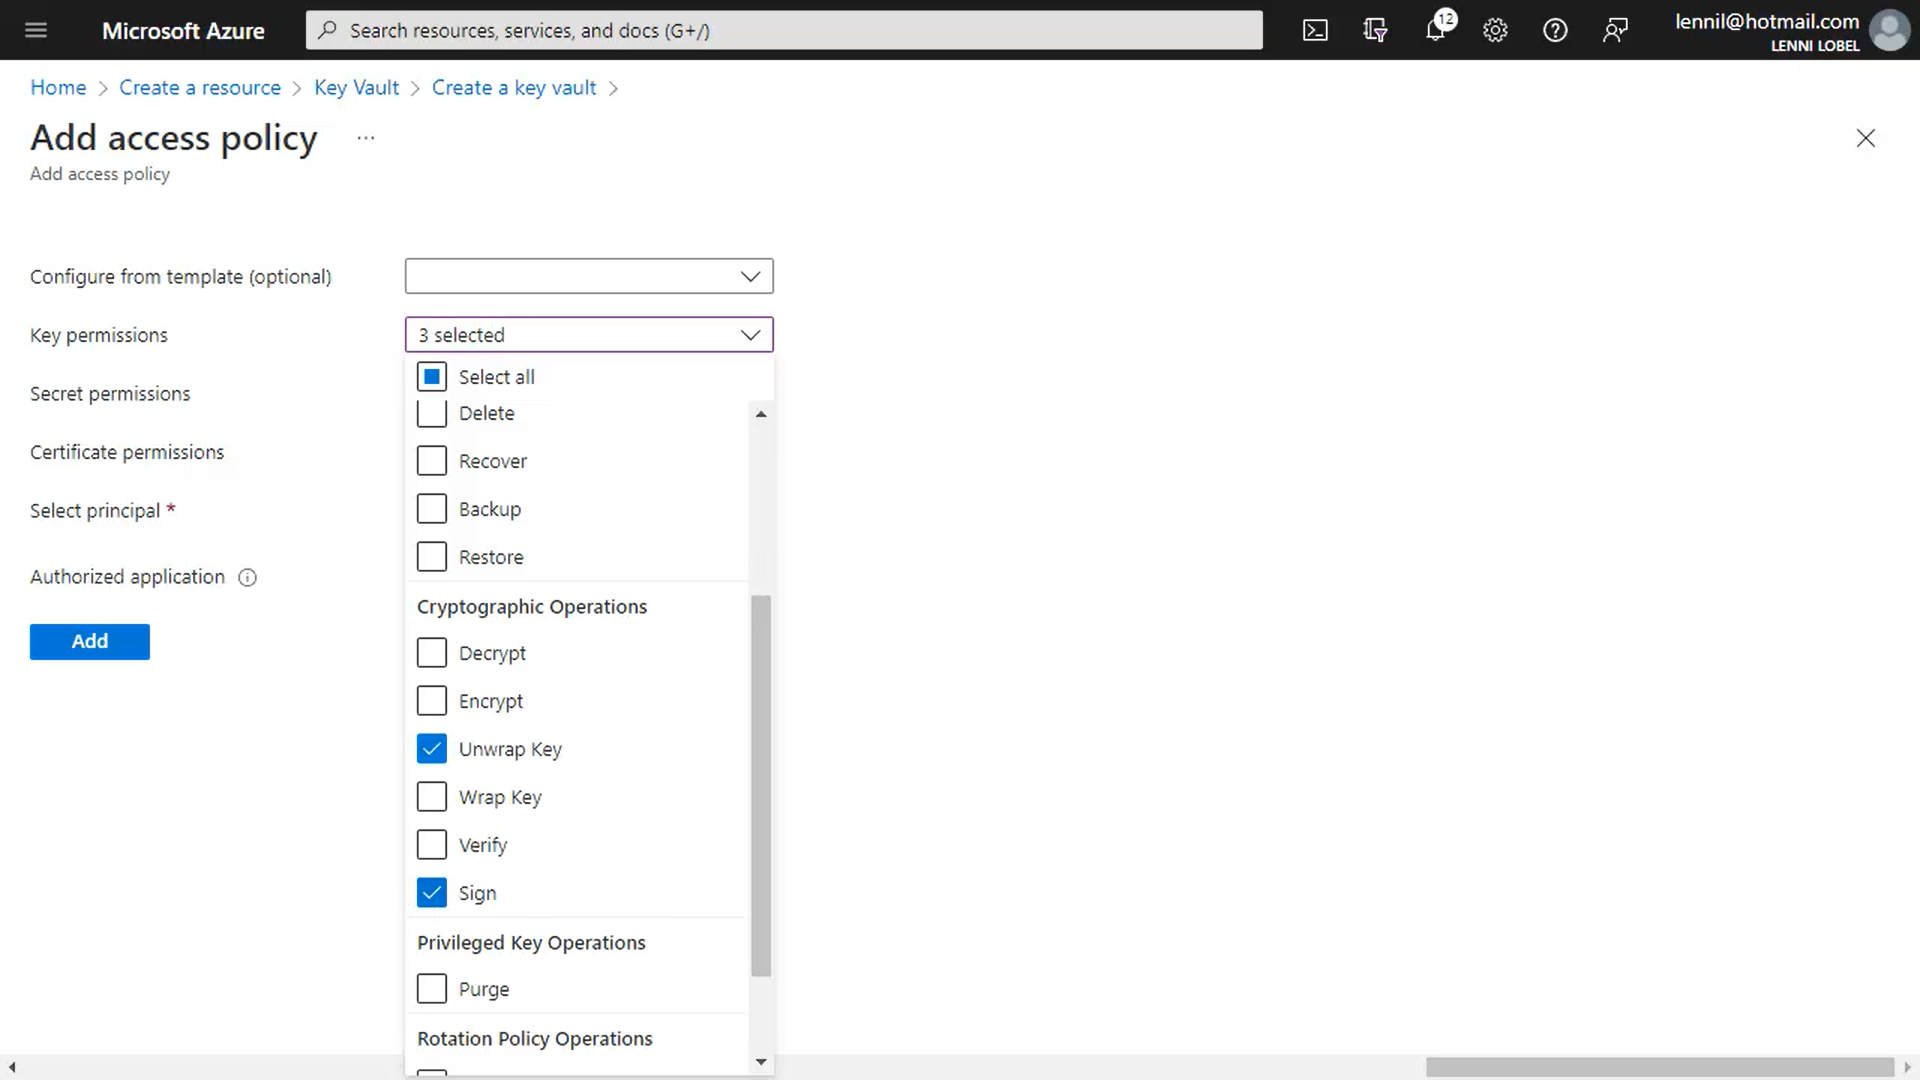
And then choose the principal, which is the app registration.
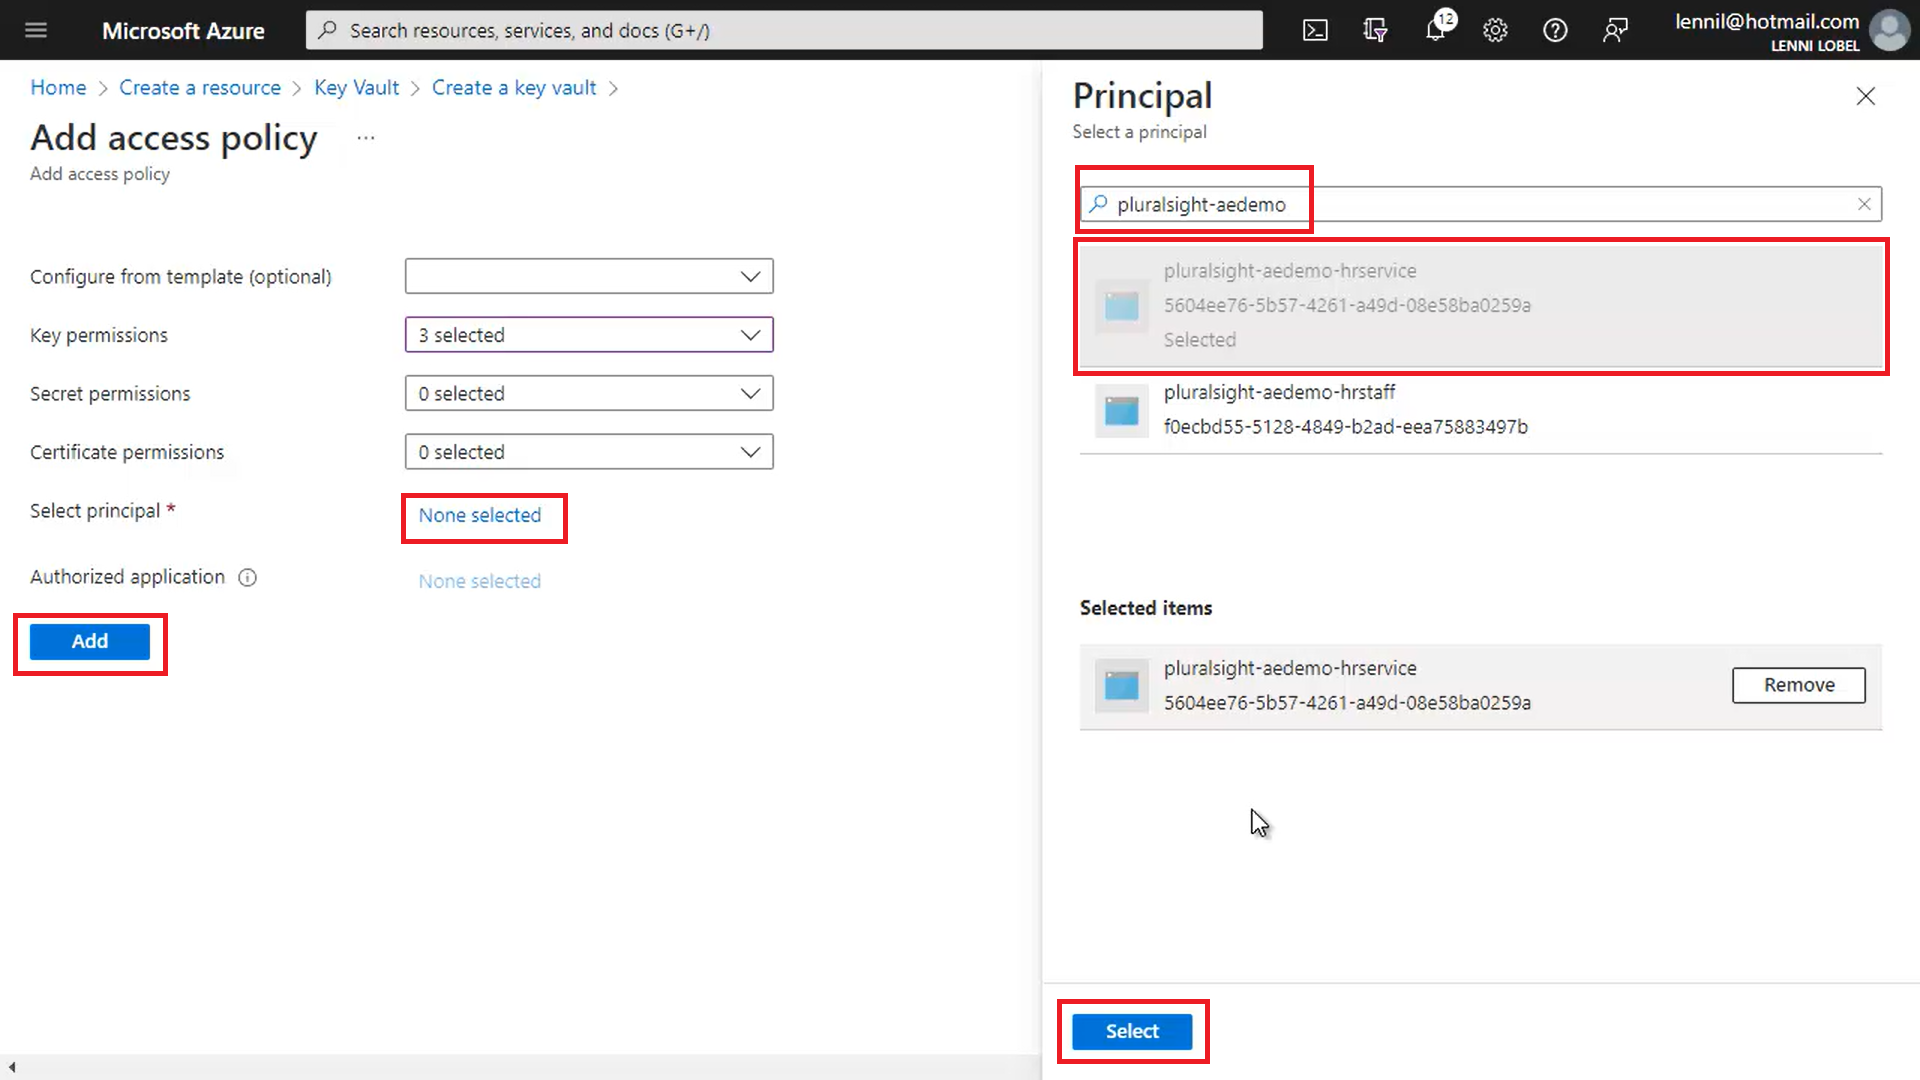
Click the None selected link, and then filter the list this down to pluralsight-aedemo, and you’ll find the two app registrations that we created starting with that name, which are the two that we need. For this access policy we’ll choose the pluralsight-aedemo-hrservice app registration, and then we’ll create a second access policy for this key vault that points to the pluralsight-aedemo-hrstaff app registration.
Click Select to choose the app registration, and then click Add to create the access policy:
Now repeat for the second access policy:
- Click Add Access Policy
- Check the three key permissions for Get, Unwrap Key, and Sign
- Choose the principal (app registration) pluralsight-aedemo-hrstaff
- Click Add
And now, here are the two access policies we just created for both HR applications:
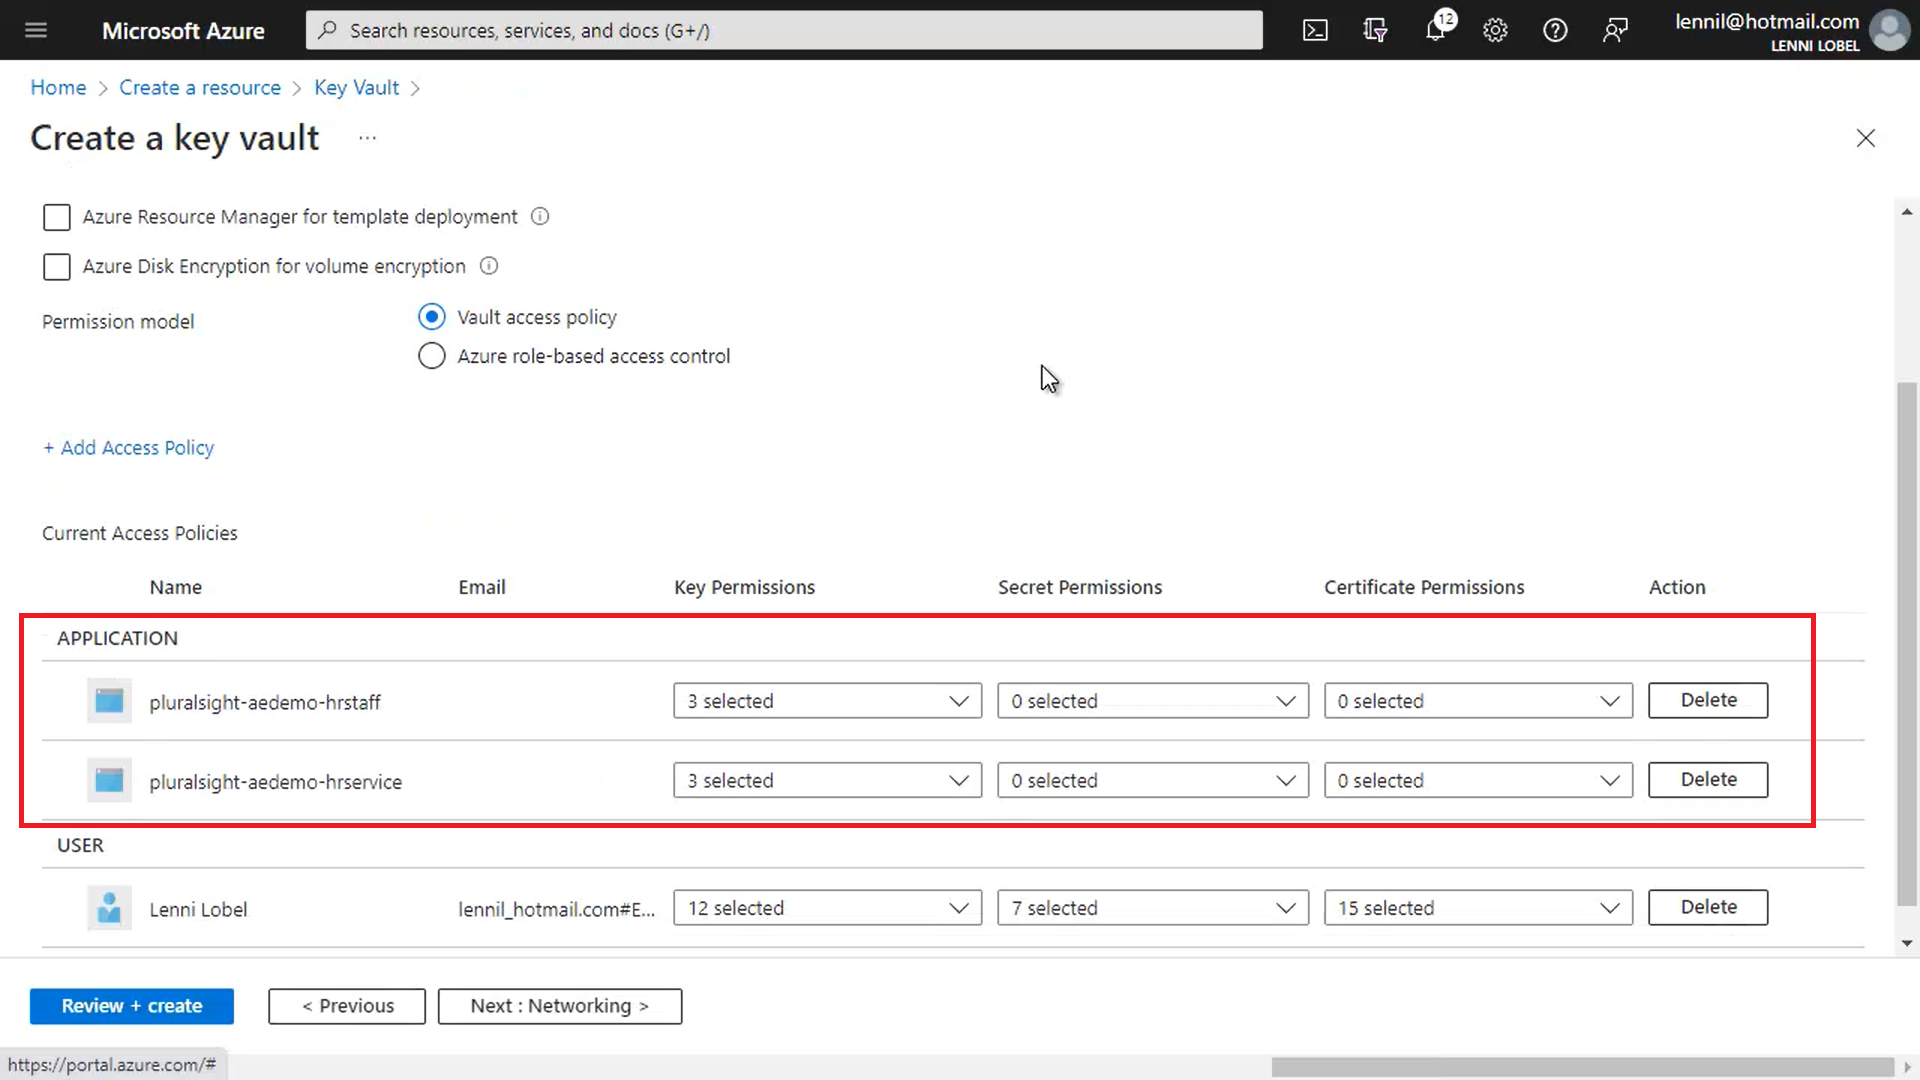
Again, this means that both applications can access this key vault, which is where we’ll store the customer-managed key for encrypting and decrypting the salary property in each document.
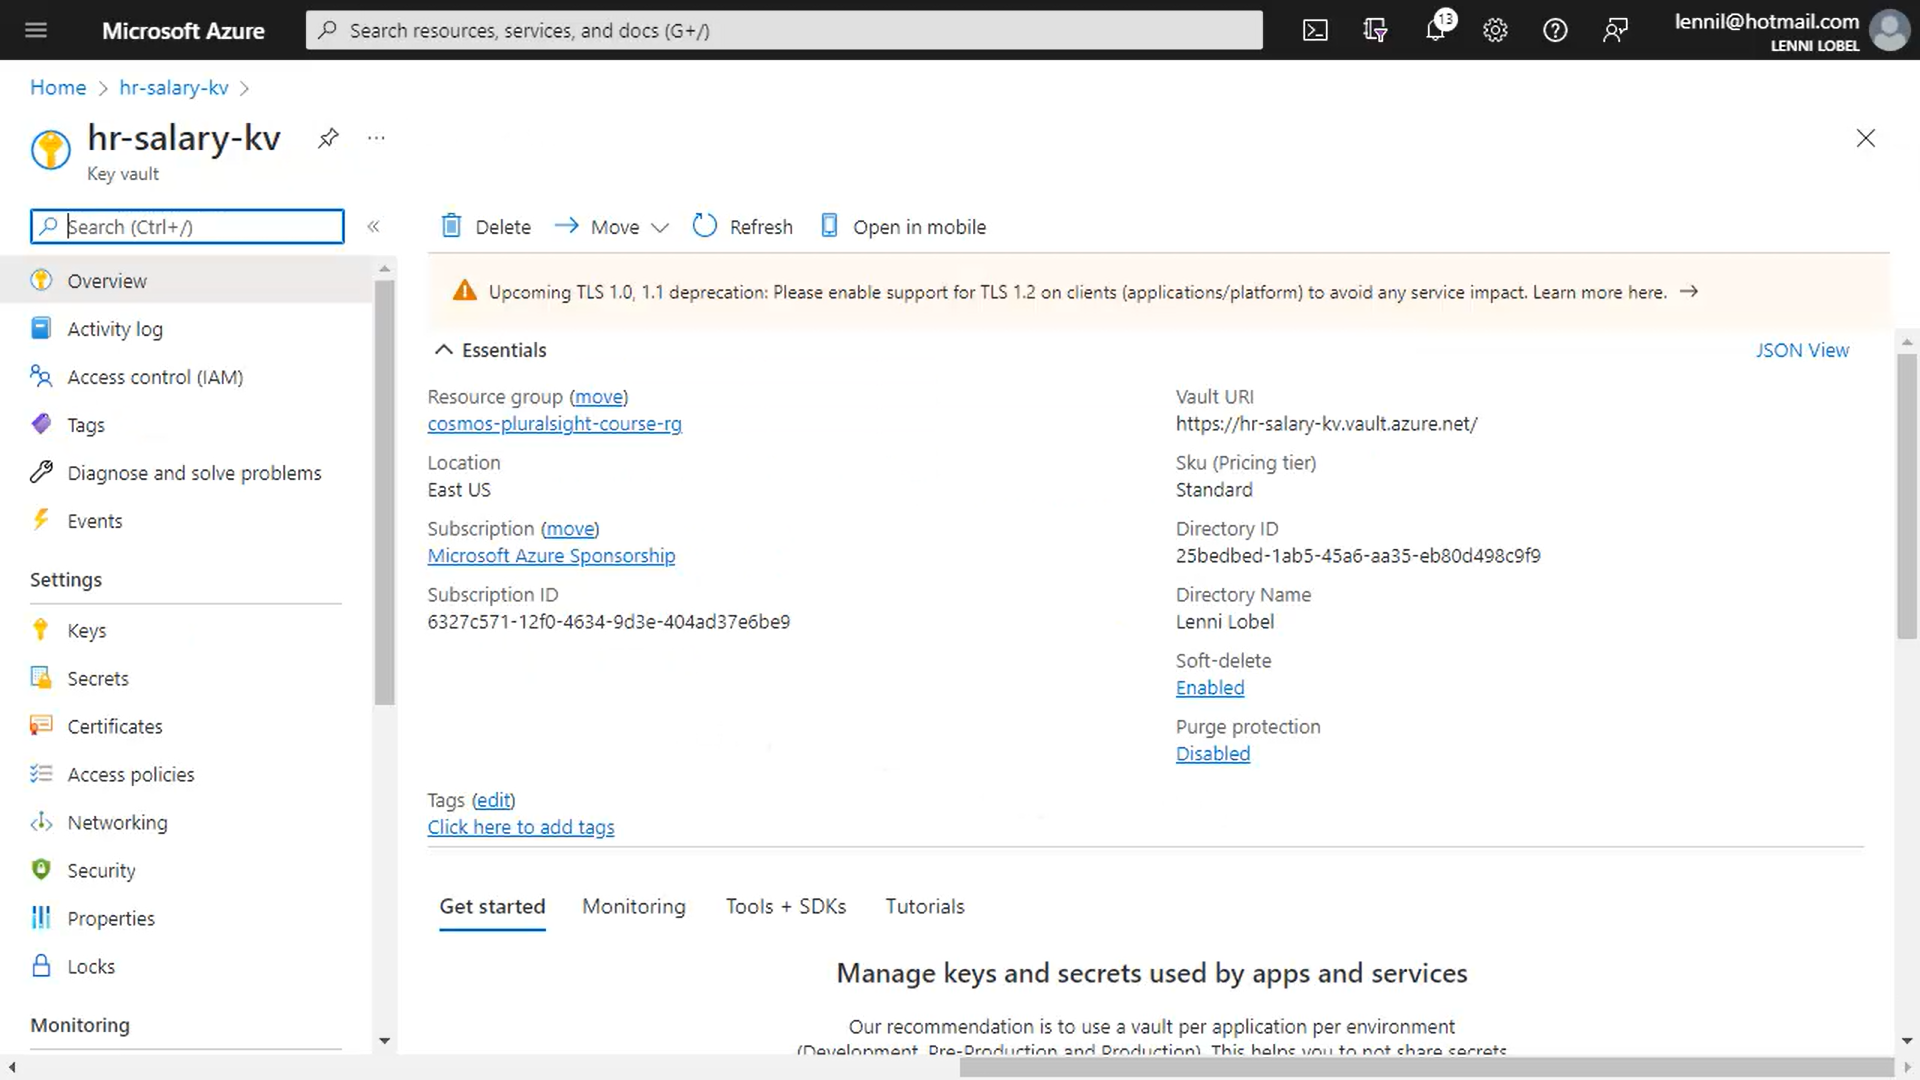
So now click Review & Create, and then Create, and just a few moments later, we have our new key vault:
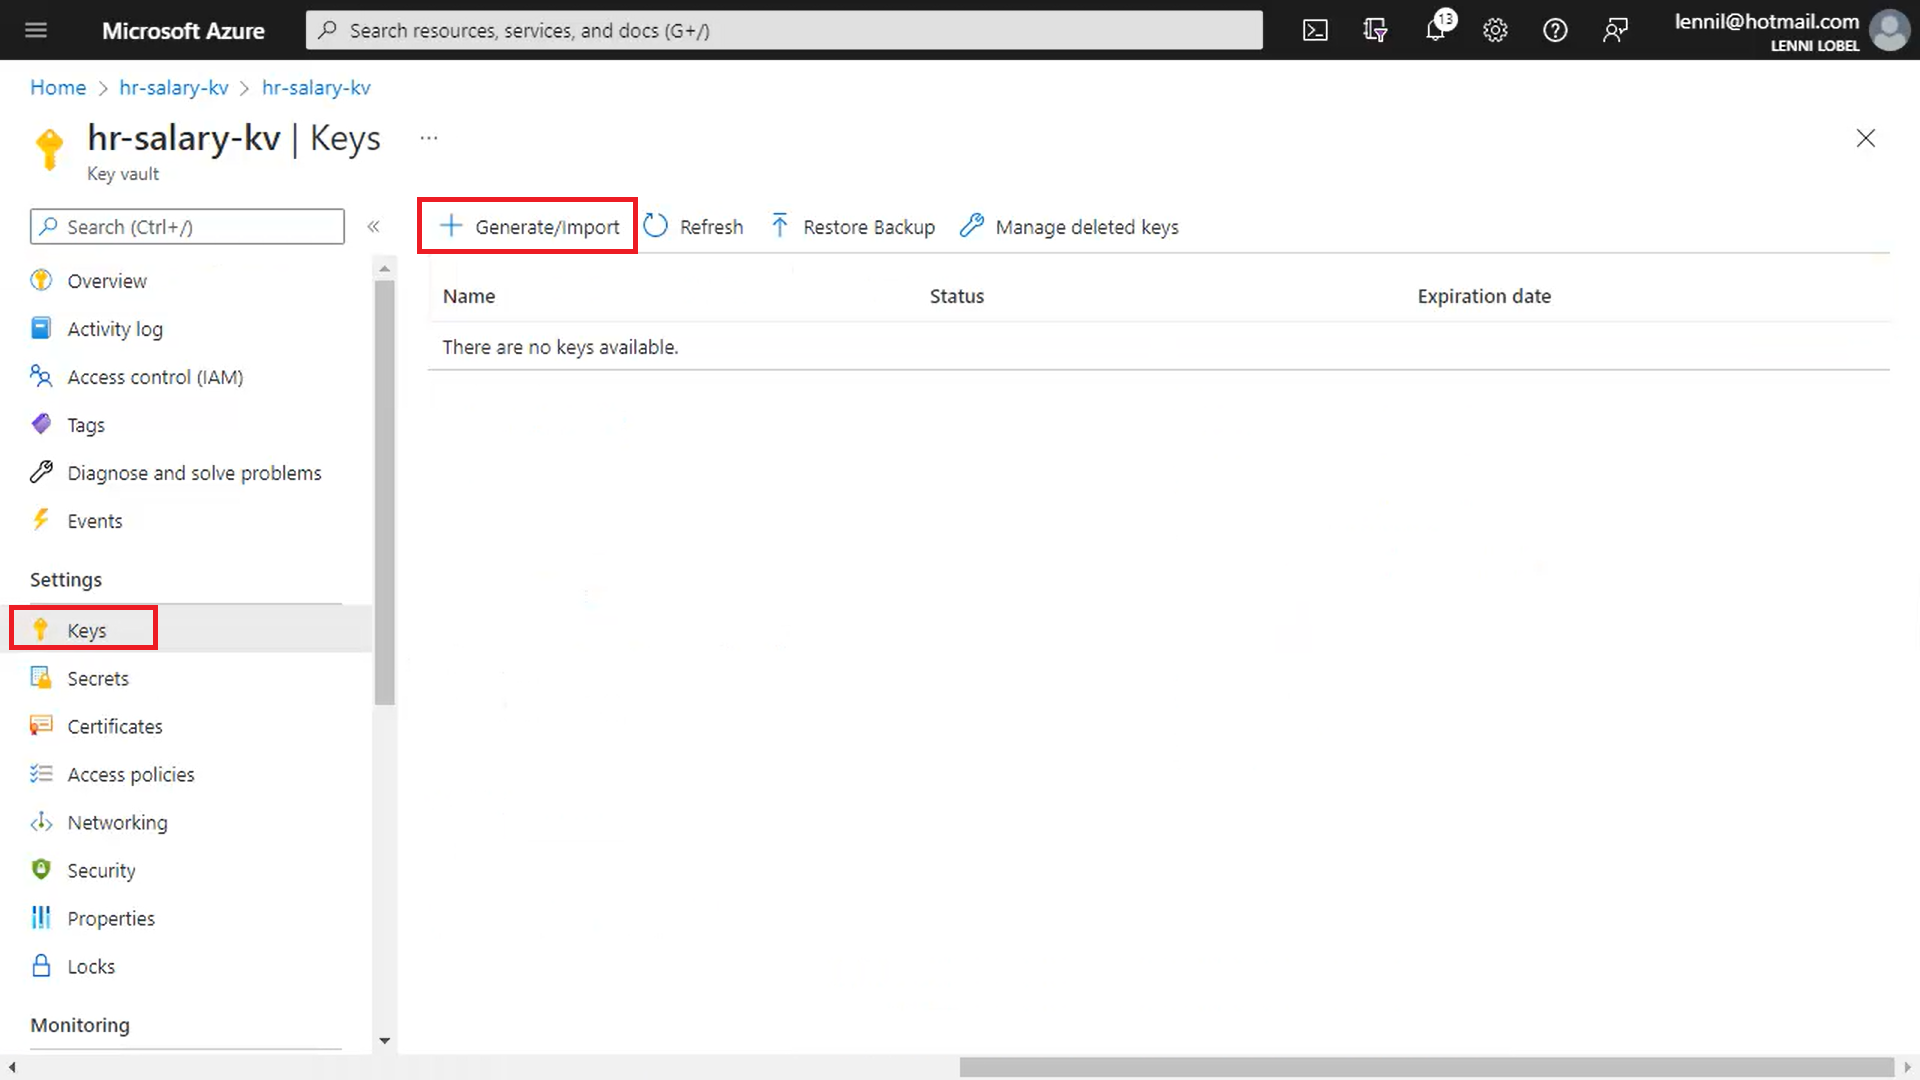
Now let’s create the key itself. Click on Keys, and then Generate/Import:
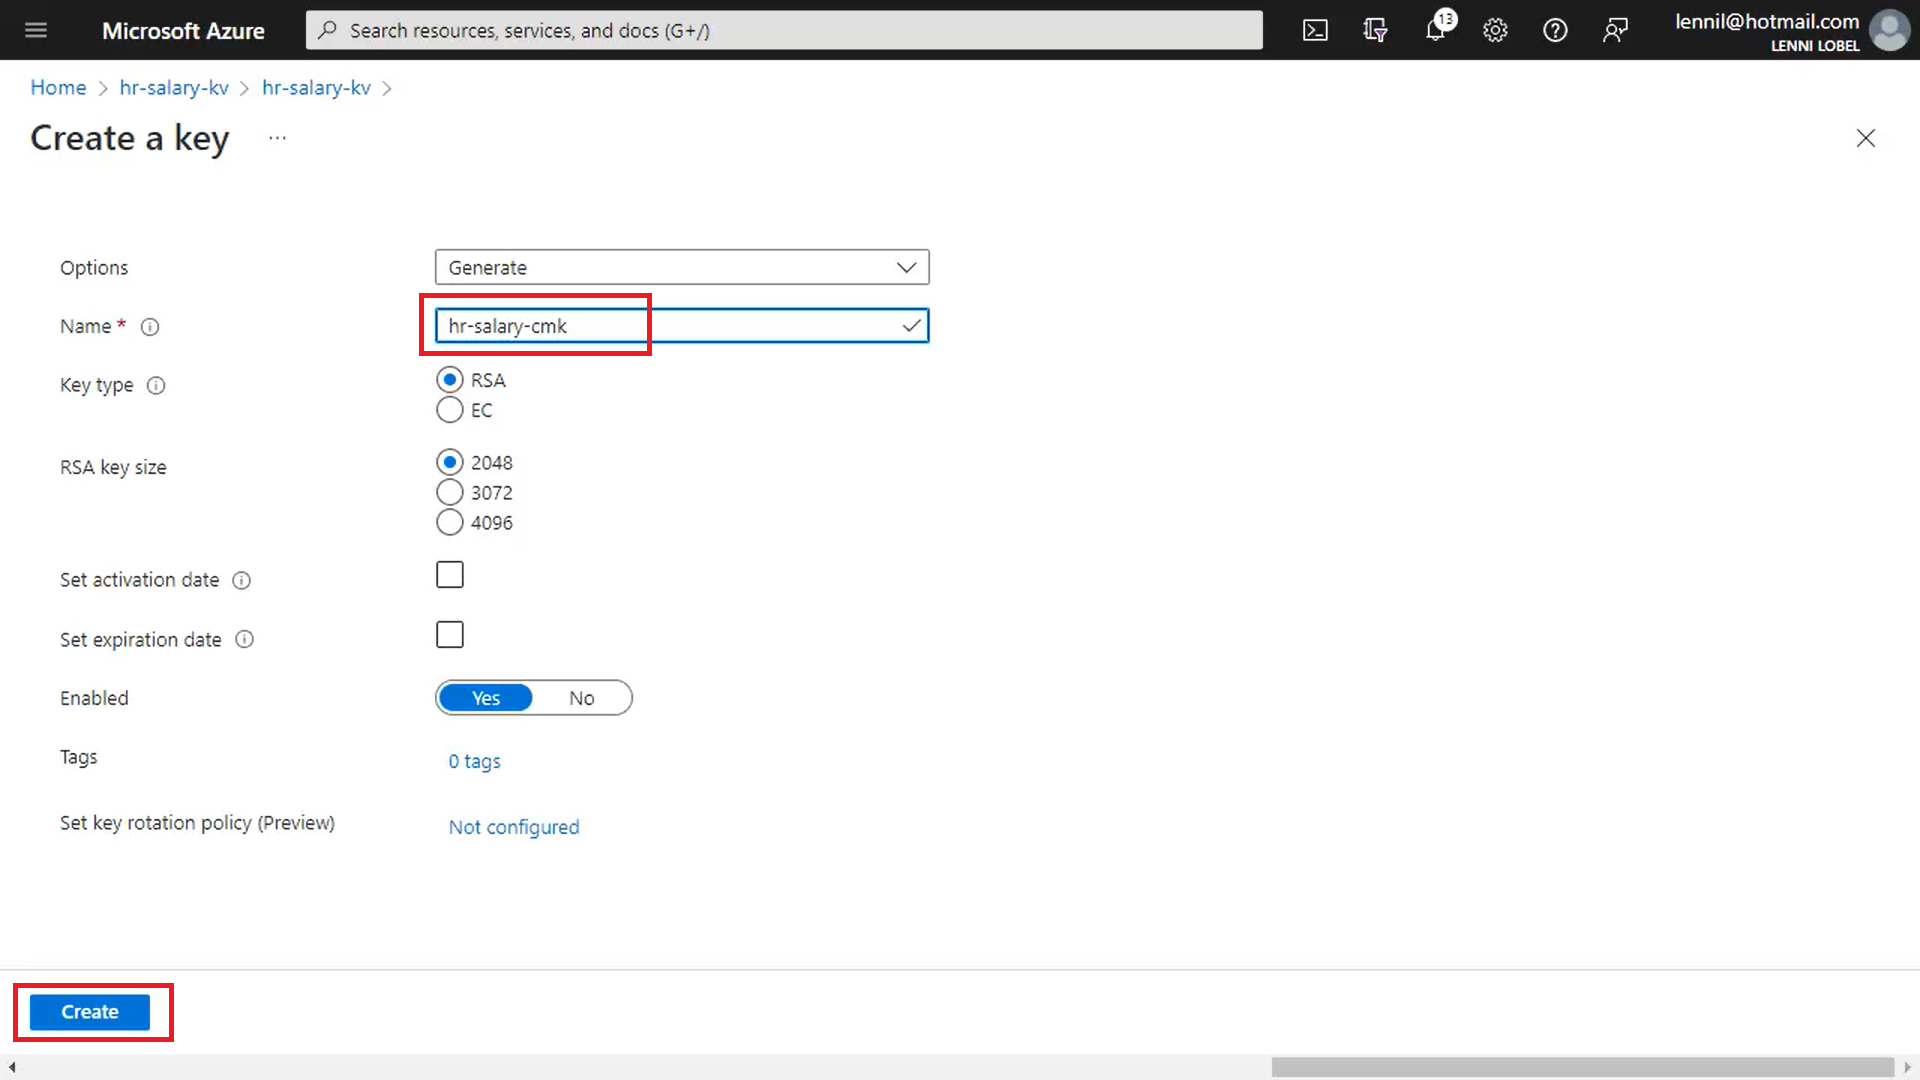
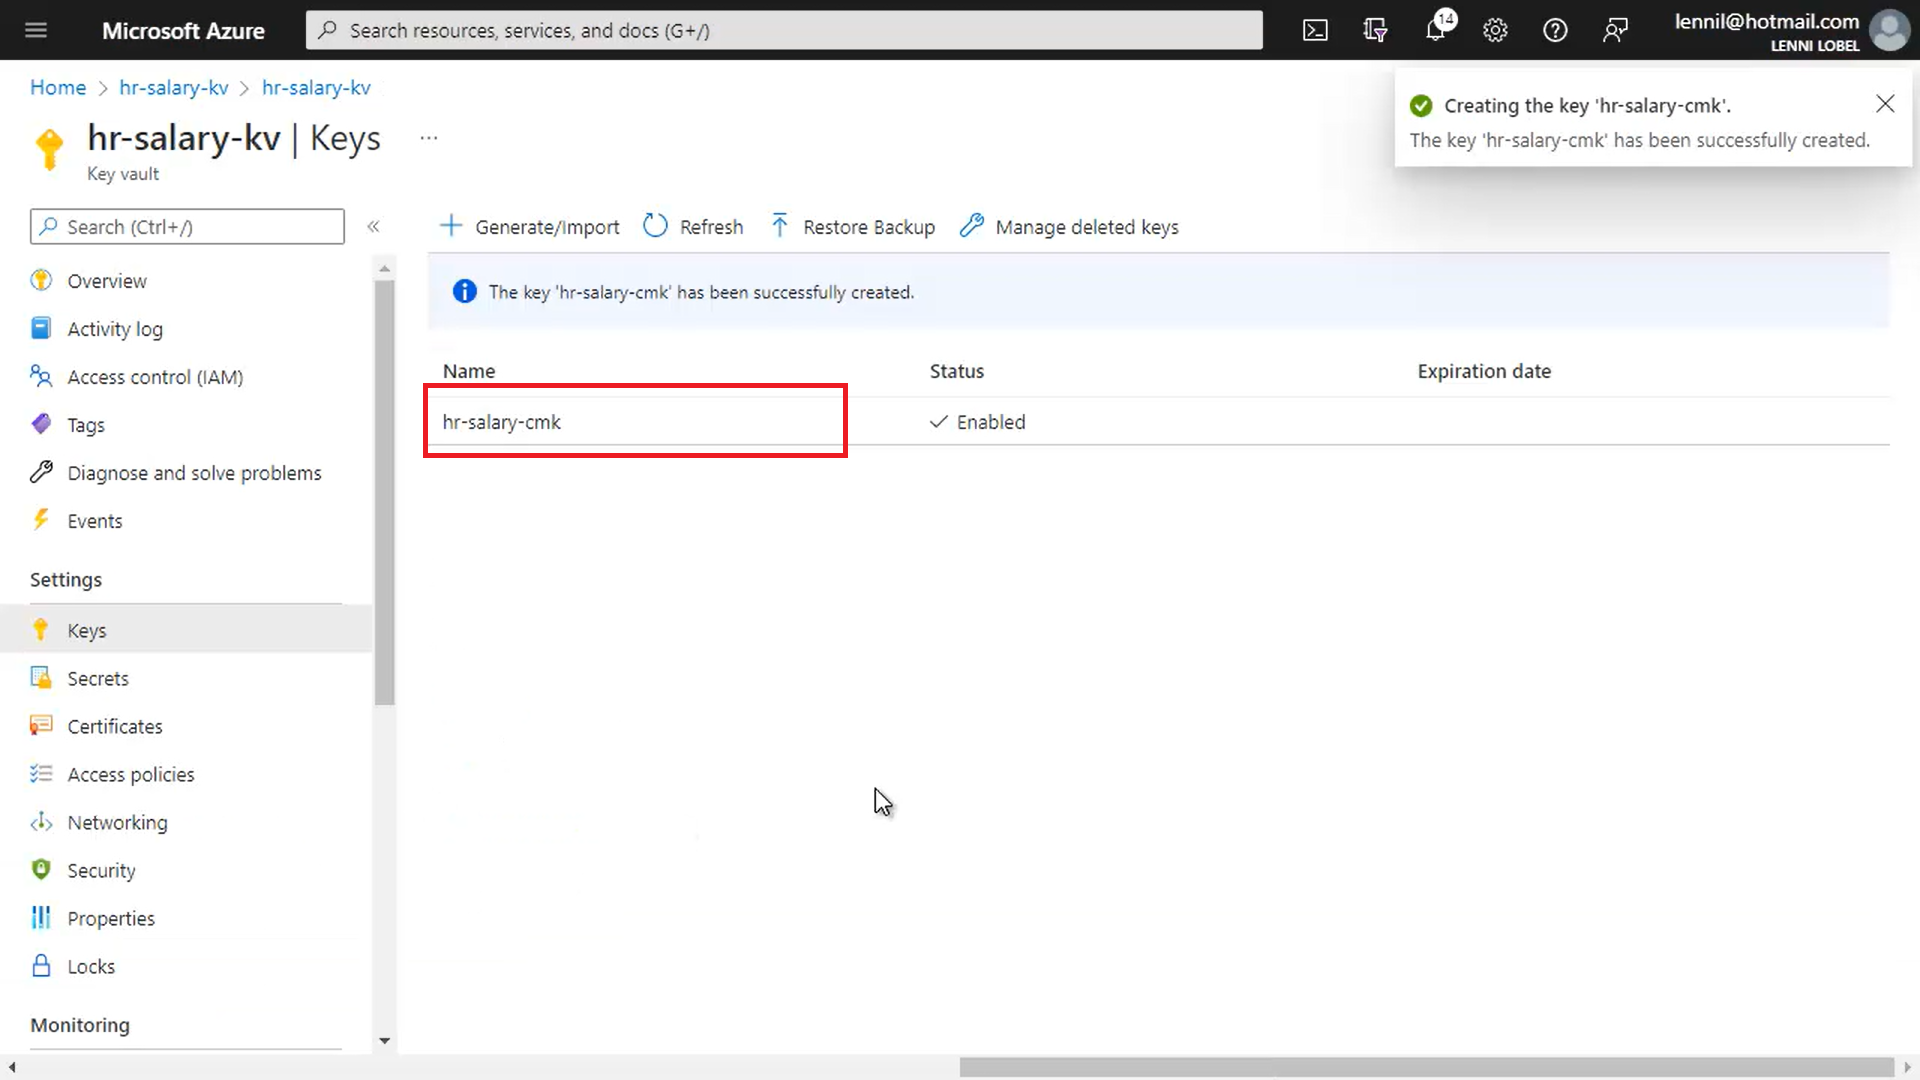
This key is for the salary property, so let’s name it hr-salary-cmk, for customer-managed-key. All the other defaults are fine, so just click Create.
And we’ve got our new CMK. We’ll need an ID for this CMK when we create our employees container, so click to drill in:
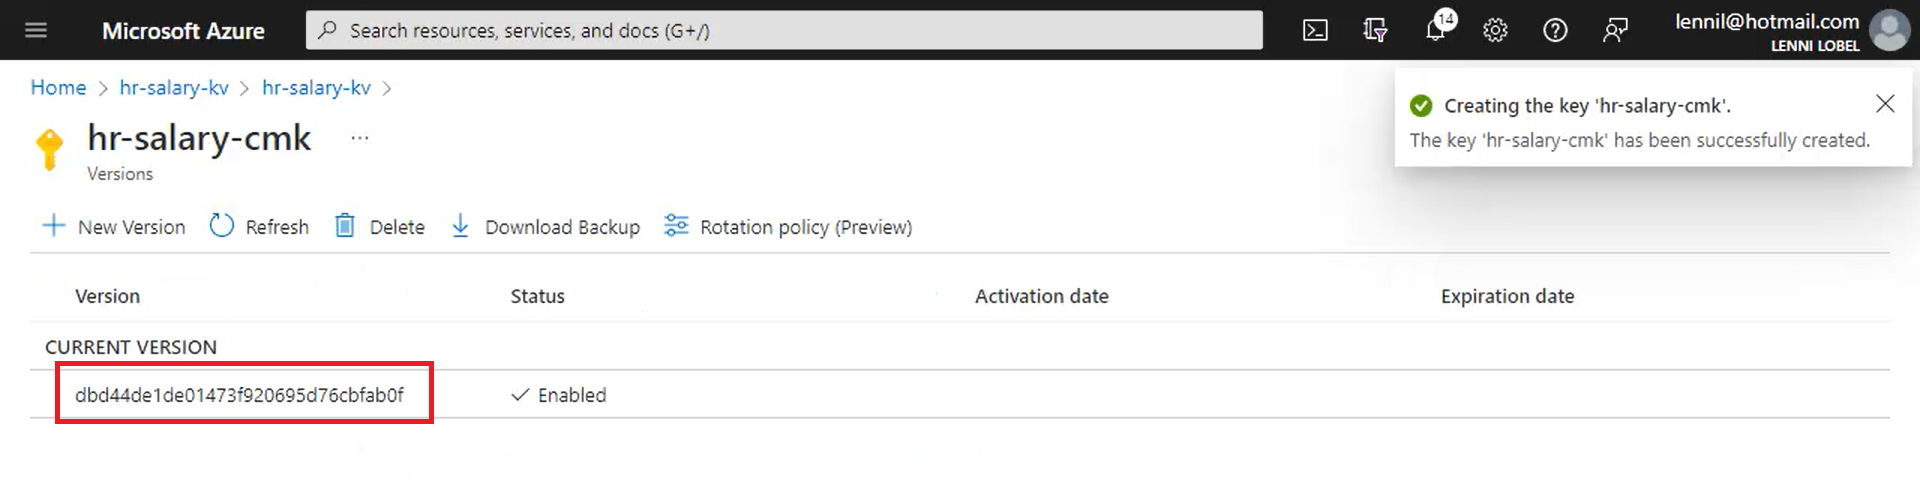
Now copy its Key identifier, and paste that into Notepad:
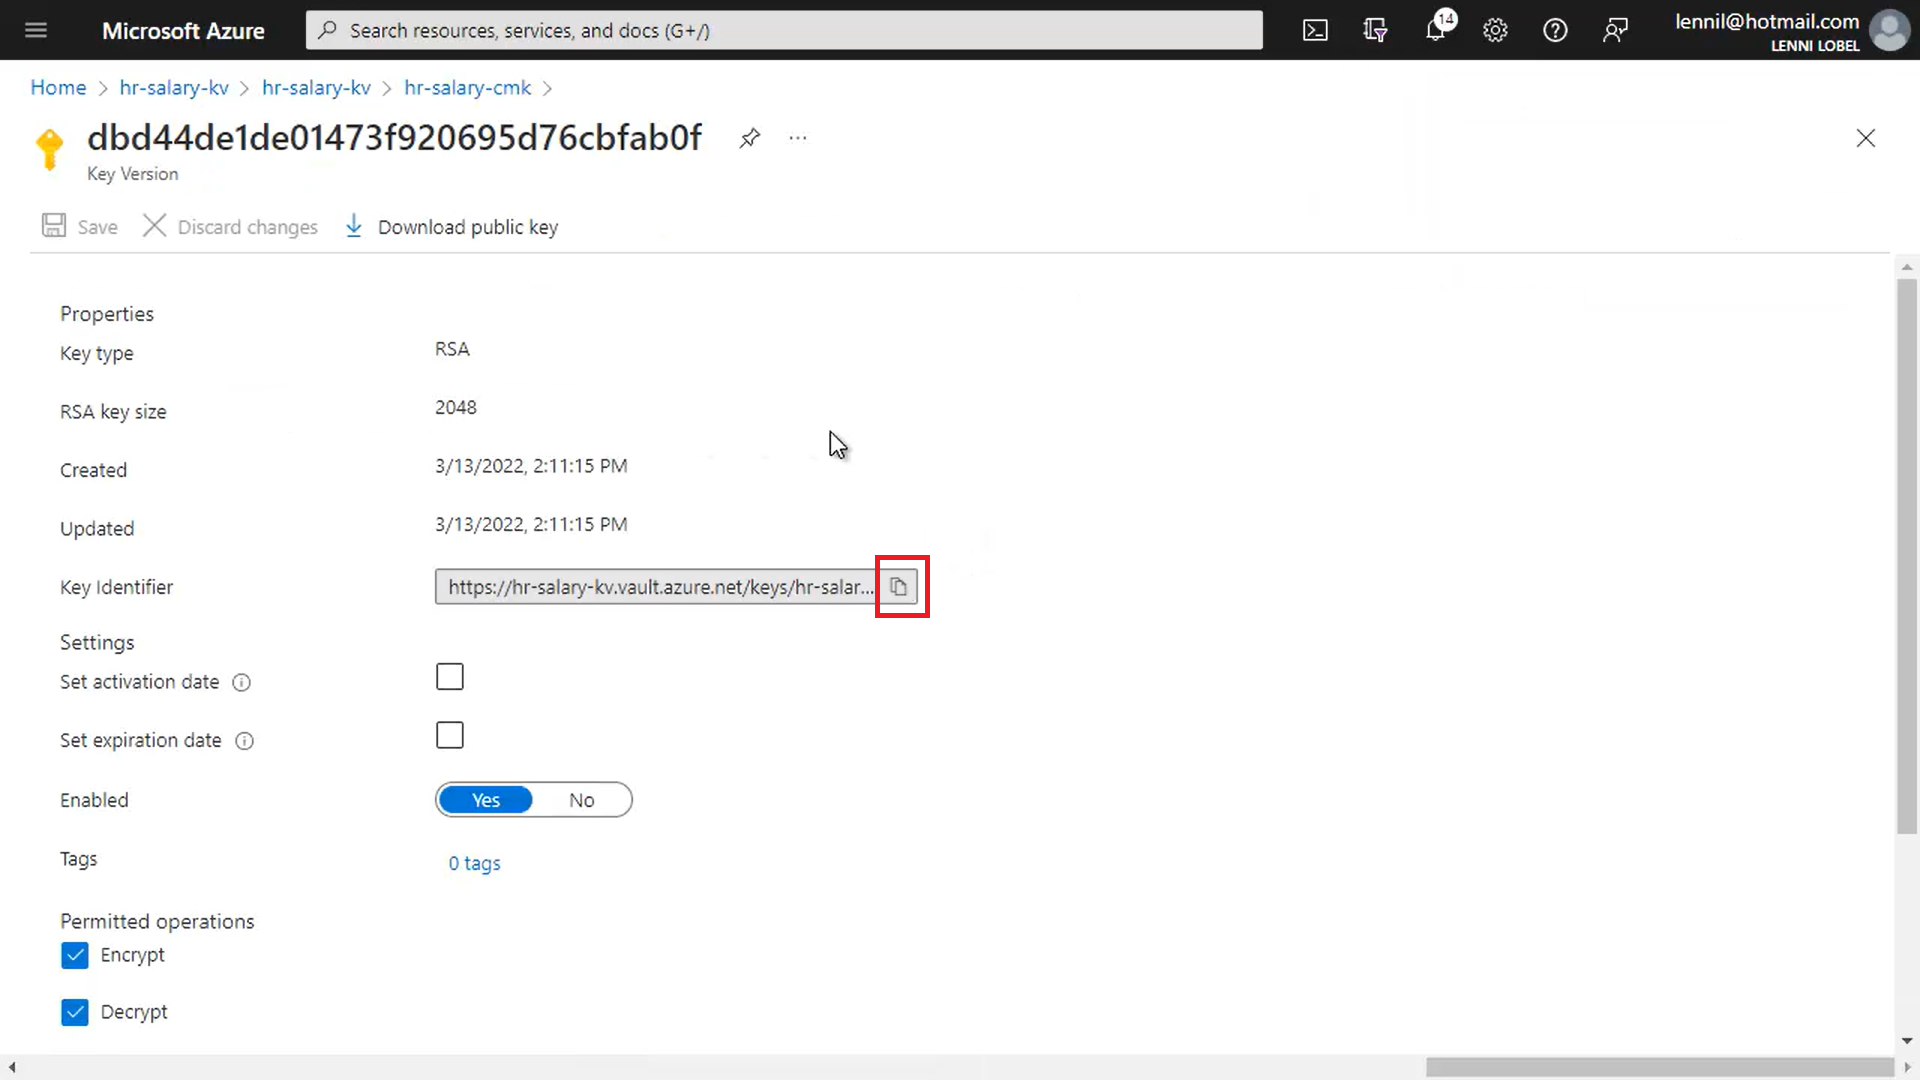
Finally, repeat this process for the second key vault.
- Create a Resource, search for key vault, and click Create.
- Name the new key valut hr-ssn-kv
- Click Next for the access policy, only this time create just one for the HR Service application, and not the HR Staff application, which should not be able to access the social security number property.
- Check the key permissions Get, Unwrap key, and Sign.
- For the principal, select the app registration for the HR Service application – pluralsight-aedemo-hrservice.
- Click Add to create the access policy
- Click Review and Create, and Create to create the second key vault.
- Click Keys, Generate/Import
- Name the new key hr-ssn-cmk and click Create.
- Click into the CMK to copy its key identifier and paste it into Notepad
All our work is done in the Azure portal. At this point, your Notepad document should contain:
- Azure AD directory ID
- Two HR application client IDs
- Two HR application secrets
- Two customer-managed key IDs
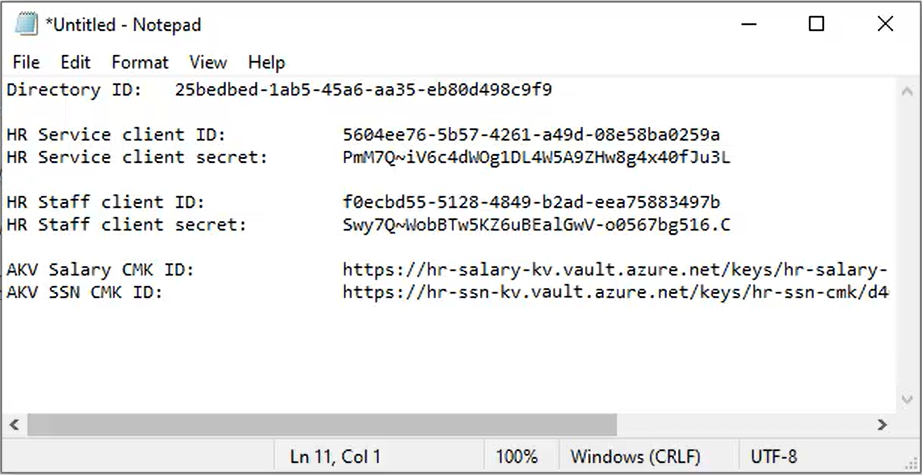
Save this document now. It will be needed when we build the two client applications in my next post.